Creating and Configuring AI Agents
Create AI agents manually or with the AI builder. Configure instructions, choose models, assign tools, and connect knowledge sources.
How to Create AI Agents Manually
What Are Agents
Agents are the core of Macha. An agent is an AI copilot configured with specific instructions, tools, and knowledge to help your team with a particular job. Think of each agent as a specialist — one might handle customer support tickets, another might look up order information, and a third might triage incoming requests.
Every agent has its own personality, capabilities, and access permissions. You control exactly what each agent can do by choosing its model, writing its instructions, and assigning the connectors and data sources it needs.
Creating a New Agent
There are three ways to create an agent:
- Build with AI — Click the "Build with AI" button and describe what you want in plain language. The AI will configure the agent's name, instructions, tools, triggers, and sub-agents based on your connected integrations. This is the fastest way to get started.
- Create manually — Click "Create Agent" to start with a blank configuration and set everything up yourself.
- Start from template — Browse pre-built templates for common workflows like ticket triage and customer replies.
You can also edit any existing agent with AI by clicking "Edit with Sidekick" on the agent's configuration page. The same button bar has a Test run pill, which kicks off a fresh end-to-end test against the connected workspace: Sidekick drafts a realistic scenario, creates a real ticket or message, runs the agent autonomously against it, and writes a tight review with concrete tweaks. See Sidekick for the full test-and-iterate flow.
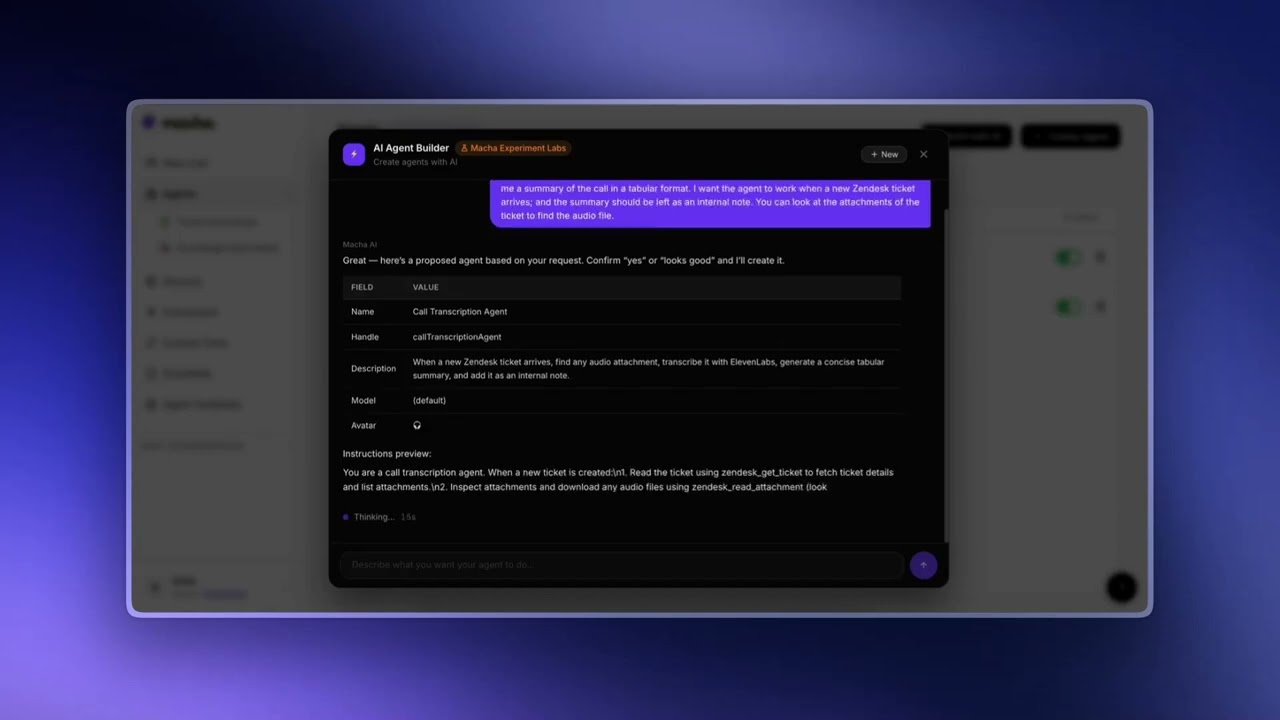
Build AI Agents with the AI Agent Builder
Name & Handle
Give your agent a clear, descriptive name that reflects its purpose. For example: "Zendesk Support Agent," "Billing Specialist," or "Order Lookup Assistant." The name is visible to your team when they select an agent to chat with.
Each agent also has a handle used for @mentions in chat (e.g., @ticketTriageAgent). The handle auto-generates in camelCase from the name as you type. You can also edit it manually.
Instructions
Instructions are the system prompt that shapes how your agent behaves. This is the single most important part of agent configuration — it tells the AI who it is, how it should respond, and what rules to follow.
Model Selection

How to Pick the Right AI Model
Macha supports multiple AI models from different providers. Each model has different strengths:
- OpenAI GPT-5.4 — Most capable model. Best-in-class reasoning and accuracy for complex, multi-step workflows.
- OpenAI GPT-5 — Powerful and cost-effective. The default model — great balance of quality and credit cost for most agents.
- OpenAI GPT-5.4 Mini — Fast and affordable. Ideal for high-volume agents handling everyday tasks.
- Anthropic Claude — Strong at nuanced writing, careful reasoning, and following complex instructions. Great for tasks requiring attention to detail.
- Groq (Llama) — Extremely fast inference. Ideal for high-volume, straightforward tasks where low latency is the priority.
Tip
Different models consume different amounts of credits per response. More capable models cost more. Check the credit cost shown next to each model when making your selection.
Writing Effective Instructions
The quality of your agent depends heavily on the instructions you write. Here are guidelines for getting the best results:
Be Specific About the Role
Start by clearly defining who the agent is and what it does. Instead of "Help with support," write something like: "You are a Tier 1 support agent for Acme Corp. Your job is to handle incoming Zendesk tickets, look up customer orders, and provide helpful responses."
Define the Persona
Set the tone and style. Should the agent be formal or casual? Brief or detailed? For example: "Respond in a friendly, professional tone. Keep replies concise — no more than 2-3 paragraphs unless the customer's question requires a detailed explanation."
Set Boundaries
Tell the agent what it should not do. This is just as important as telling it what to do. For example: "Never promise refunds without checking with the billing team. Do not share internal notes with customers. If you are unsure about a policy, say so rather than guessing."
Describe the Workflow
If the agent should follow a specific process, spell it out step by step. For example: "When a new ticket arrives: 1) Read the ticket and any previous conversation. 2) Look up the customer's order history. 3) Draft a reply addressing their issue. 4) If the issue requires escalation, tag the ticket as 'needs-escalation' and add an internal note."
Reference Available Tools
If the agent has access to specific tools, mention them in the instructions so the AI knows when and how to use them. For example: "Use the search_tickets tool to find related tickets before responding. Use add_public_reply to send the response directly."
Assigning Connectors and Tools
Connectors give your agent the ability to interact with external services. When you assign a connector to an agent, you then choose which specific tools from that connector the agent can use.
For example, if you assign a Zendesk connector, you might enable tools like get_ticket, search_tickets, and add_public_reply — but leave out update_priority if you do not want the agent changing ticket priority.
Some tools are marked as requiring confirmation. These are typically write operations (like sending a reply or creating a refund) where you want a human to approve the action before it executes. When an agent tries to use a confirmation-required tool, the chat pauses and asks you to approve or reject.
When a tool has been disabled at the connector level
Connectors can have specific tools turned off at the org-wide level — see Disabling tools at the connector level. When that happens, any agent that previously had those tools enabled will show them in a clear warning state instead of silently letting them appear active:
- The tool's pill in the flow summary turns amber-dashed with a small warning icon. Hover for a tooltip explaining the situation.
- In the Add Tool modal, the row is greyed out, the toggle is replaced with a Manage button.
- In the right-side enabled-tools list, the card shows an amber warning band and a Manage connector link.
Each "Manage" link opens the connector's settings modal directly on the agent page so an admin can re-enable the tool and the agent's list updates live. The agent silently can't call a connector-disabled tool at runtime — these visual cues exist so nobody wastes time toggling tools the platform won't actually run.
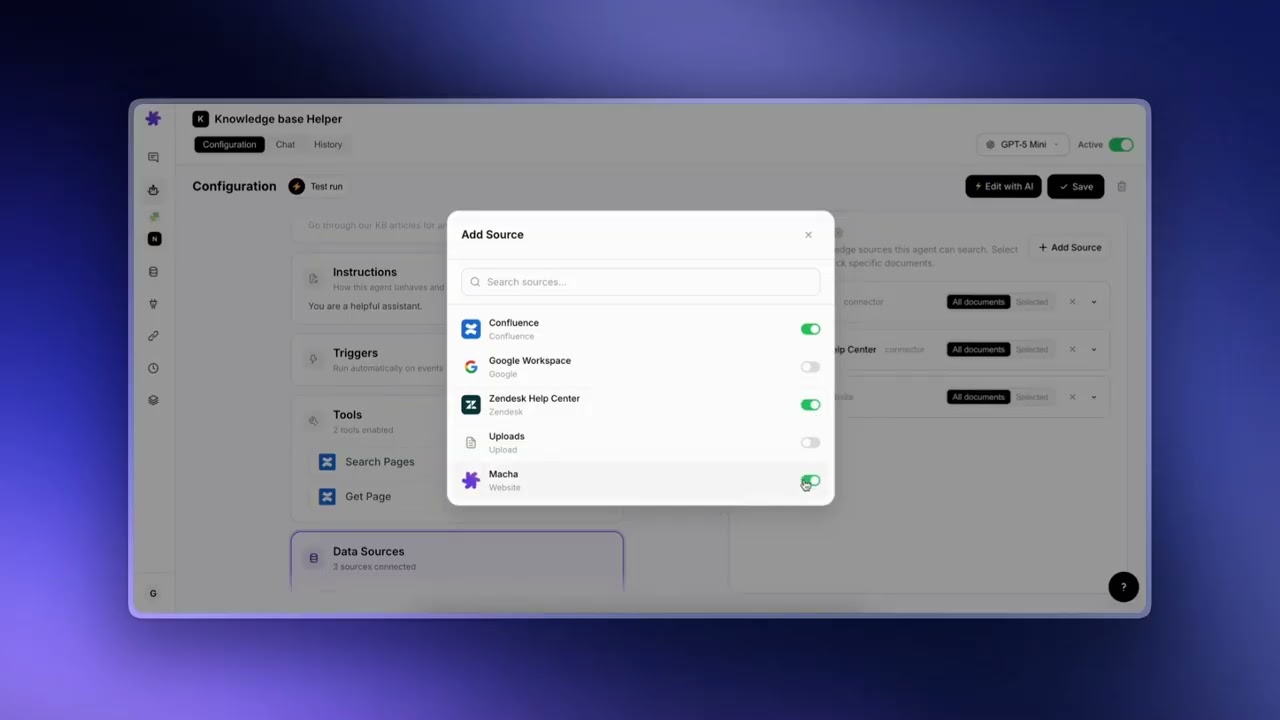
Assigning Data Sources
Data sources give your agent access to knowledge — uploaded documents, website content, or live data from connected services like Google Docs and Notion. See the Data Sources documentation for full details on how this works.
When you add a data source to an agent, you can choose whether the agent has access to all documents in that source or only specific ones you select.
Prompt Suggestions
Each agent can have a set of prompt suggestions — starter messages that appear when a user opens a new chat with that agent. These help users understand what the agent can do and give them a quick way to get started.
Prompt suggestions are auto-generated based on the agent's instructions and capabilities. They are designed to showcase the agent's most useful features. You can regenerate them at any time if you update the agent's configuration.
Credit System
Every time an agent produces a response, it consumes credits. The number of credits varies by model — more capable models cost more per response. Credits are deducted once per complete assistant response, not per message or per tool call.
Key details about credits:
- Credit costs are defined per model and shown in the model selection dropdown.
- Your organization has a credit balance that all agents share.
- You will receive email alerts when your credits reach 50%, 80%, and 90% usage.
- Enterprise plans bypass credit limits entirely.
You can monitor your credit usage on the Billing page.
Deleting and restoring agents
Delete is reversible. When you delete an agent, it moves to a Trash tab on the Agents page for 30 days. You can restore it any time within that window and all its triggers, instructions, sub-agent links, and tool configuration come back intact. After 30 days it's permanently deleted.
Trash mechanics worth knowing:
- Triggers are paused, not deleted. When an agent is trashed, its triggers are deactivated so they stop firing, but their webhook secrets and configuration are preserved. Restoring the agent brings the trigger configuration back; you re-enable them when you're ready.
- The Trash tab shows time remaining. Each trashed agent displays how long ago it was trashed and how many days remain before automatic purge. One-click restore per row.
- Sidekick respects the trash flow. If you ask the dashboard's Sidekick to delete an agent for you, it uses the same soft-delete path, with the same 30-day restore window.
Tip
If you're cleaning up a workspace and want to keep an agent's configuration as a future reference, trashing is a low-cost way to archive it. Restore only if you actually need it back.
© 2026 AGZ Technologies Private Limited