
 Shopify
 Stripe
 Slack
Slack Notion
 Google Workspace
 Confluence

How Do You Connect Zendesk to Macha? OAuth Setup in 5 Minutes (2026)


Connecting Zendesk to Macha is one OAuth authorization by a Zendesk admin: enter your subdomain, click Connect, and approve on Zendesk's screen. Since April 2026 there is no API token to mint and no OAuth client to register in Admin Center.
Key takeaways
- Connecting Zendesk to Macha takes about five minutes: open Connectors, enter your Zendesk subdomain, click Connect, and approve on Zendesk's Authorize screen as an admin.
- On April 9, 2026, Zendesk approved Macha's global OAuth client, so customers never register their own OAuth client in Zendesk Admin Center.
- The Macha Zendesk connector ships 17 tools across read, reply, ticket update, routing and knowledge groups, plus eight triggers for running agents autonomously.
- Macha's Reconnect button re-authorizes a Zendesk connection in place and keeps the same connector ID, so agents and enabled tools keep working.
- Connecting Zendesk to Macha is free; agent work is billed per ticket from $299 a month for 750 tickets, about $0.40 each, with setup by the Macha team and a dedicated success manager included.

To connect Zendesk to Macha, open Connectors in Macha, enter your Zendesk subdomain, click Connect, and approve access on Zendesk's Authorize screen as a Zendesk admin. It takes about five minutes, most of which is Zendesk's own consent screen loading, and you never create an OAuth client or paste an API token.
What are the steps to connect Zendesk to Macha?
If you just want the steps:
- In Macha, open Connectors and pick Zendesk.
- Enter your Zendesk subdomain (the
yourcompanyinyourcompany.zendesk.com). - Click Connect. You're redirected to Zendesk's Authorize screen.
- Sign in as a Zendesk admin and click Allow.
- You land back in Macha with the connector live, tools enabled, and Help Center sync ready to switch on.
| You need | You don't need |
|---|---|
| Zendesk admin rights on the account | An OAuth client registered in Zendesk Admin Center |
Your Zendesk subdomain (for example acme) | An API token pasted into a form |
| A Macha account (the free trial is enough) | A developer, or anything installed in Zendesk first |
The rest of this post explains what each step does, why OAuth is the default now, and how to avoid the two or three things that trip people up.
Why does Macha use OAuth, and do you need to create anything in Zendesk?
Connecting a third-party app to Zendesk over OAuth normally means an admin has to register an OAuth client inside Admin Center → Apps and integrations → APIs → OAuth clients, set redirect URLs, choose a client kind, and then run an authorization-code grant. Zendesk documents the whole process in its developer docs. It works, but it's fiddly, and it's the kind of setup that stalls a trial on day one.
Macha removes that step. On April 9, 2026, Zendesk approved Macha's global OAuth client, a vendor-level client that Zendesk vets once and every customer reuses. Zendesk's global OAuth client docs say developers can't create these themselves; Zendesk issues them on request. For you, the customer, that means you never create or configure a client of your own. You hit Authorize, confirm the scopes as an admin, and you're done. From that date, OAuth became the default authentication method for new Zendesk connections, replacing API key auth.
Two practical consequences of OAuth being the default:
- No long-lived API token sitting in a settings field. OAuth issues an access token plus a refresh token. Macha refreshes the access token automatically, both before expiry and as a fallback if a call comes back 401 unauthorized, with per-subdomain locking so two webhooks firing at once can't clobber each other's tokens. You don't manage any of this.
- Revocable from Zendesk's side. Because it's a granted authorization rather than a pasted key, an admin can revoke Macha's access from Zendesk at any time without you having to rotate a secret.
One nuance: the onboarding flow, the very first connection Macha walks you through when you sign up, has historically used API key auth for a simpler first run. The default OAuth path lives in the Connectors screen, which is the route this walkthrough takes and the one to use for any production connection.
Who needs to be involved before you start?
You need Zendesk admin rights on the account you're connecting. The authorization-code grant needs a Zendesk admin to approve access on the consent screen. If you're not an admin, the Allow button on Zendesk's screen won't grant the connection. Grab whoever owns your Zendesk instance for the 60 seconds it takes to click through.
You do not need a paid Macha plan to start (the free trial gives you $50 of usage with no credit card), a developer, or anything installed inside Zendesk beforehand.
Step 1: Where do you find Zendesk in Macha?
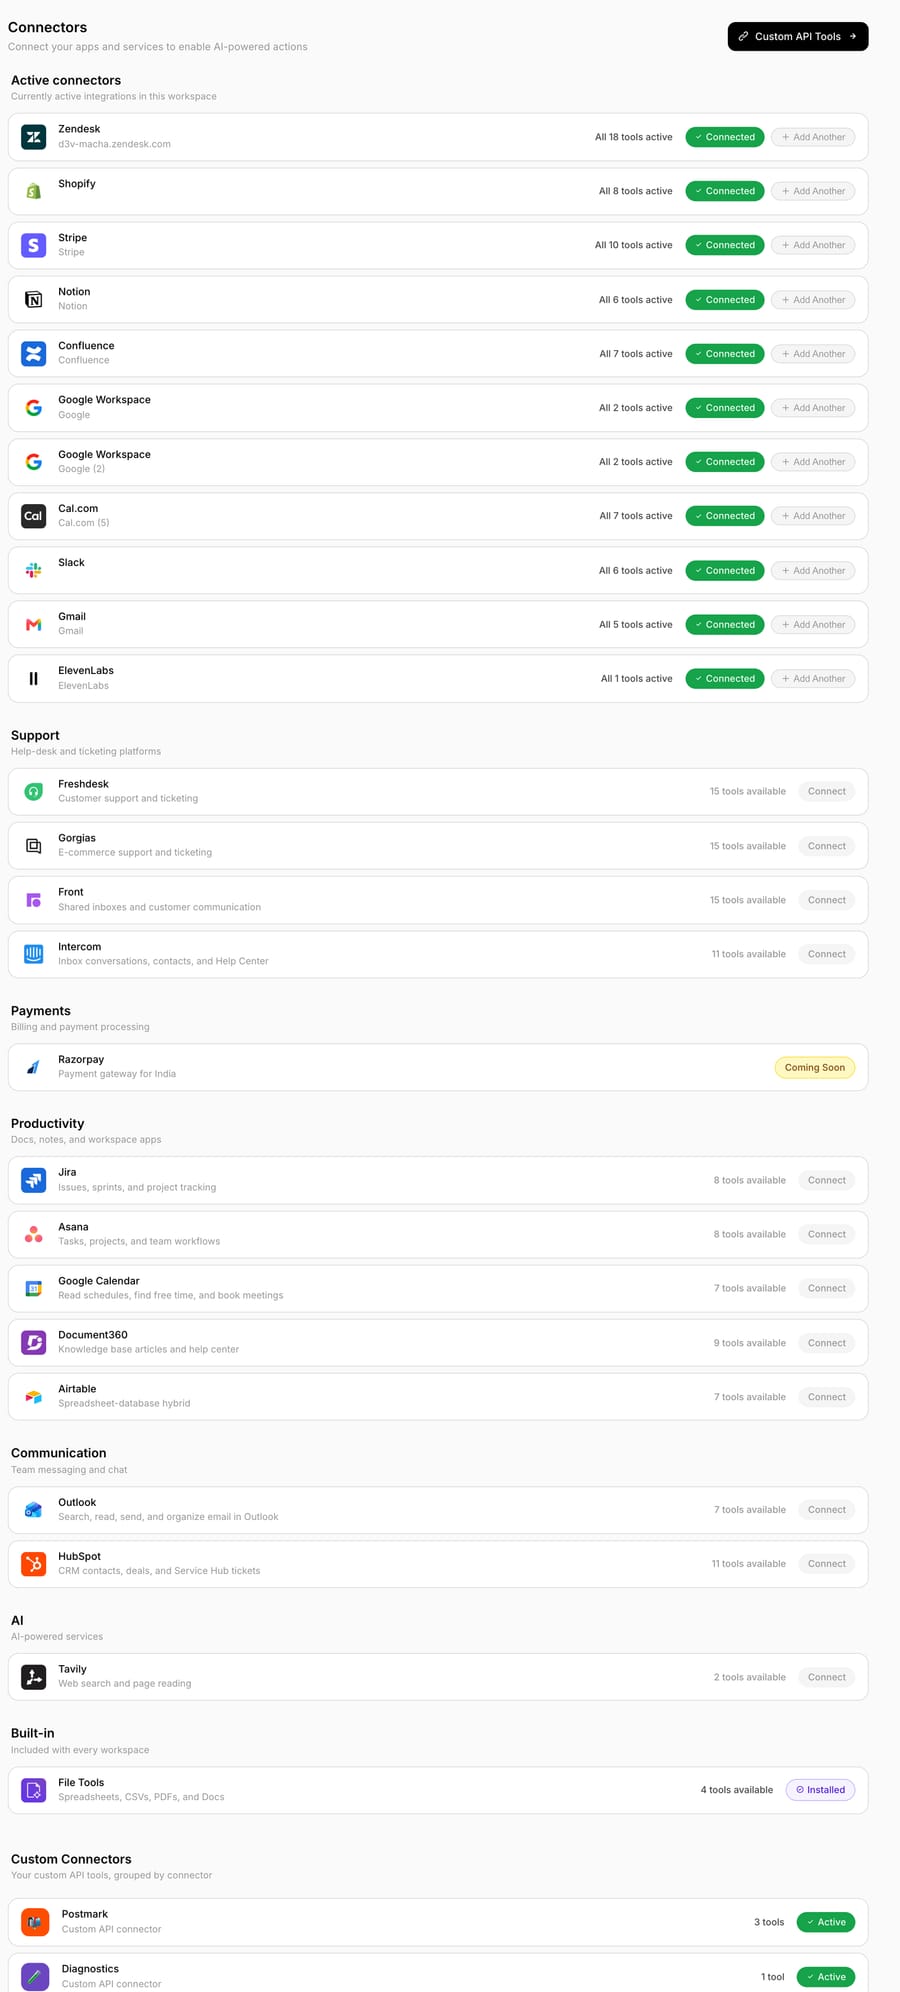
From the Macha dashboard, head to Connectors. If you're brand new, the onboarding screen nudges you to connect your first tool here. Zendesk is the natural first pick since it's the source of the tickets your agents will work.
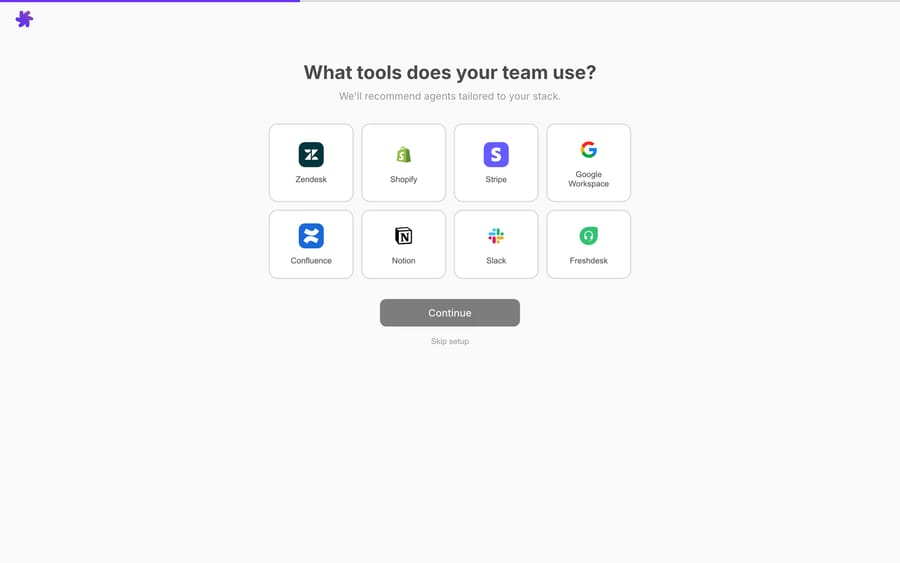
The Connectors view lists every integration Macha supports: help desks (Zendesk, Freshdesk, Gorgias, Front, HubSpot, Intercom), commerce and billing (Shopify, Stripe, Razorpay), and knowledge and comms (Notion, Confluence, Google Workspace, Slack, Airtable, Jira and more). Find Zendesk and click it.
Step 2: What does Macha ask for before redirecting you?
Macha asks for one thing: your Zendesk subdomain. That's the first part of your Zendesk URL. If your team lives at acme.zendesk.com, your subdomain is acme. Macha uses it to build the right authorization URL (https://{subdomain}.zendesk.com/oauth/...) so you're sent to your Zendesk instance and nobody else's.
Click Connect. Macha redirects you to Zendesk.
Step 3: What happens on Zendesk's Authorize screen?
This is the only part that happens outside Macha. Zendesk shows its own consent page listing the access Macha is requesting. Sign in if you aren't already, confirm you're acting as an admin, and click Allow (Zendesk may label it Authorize).
Behind the scenes, Zendesk hands Macha an authorization code, Macha exchanges it for an access token and a refresh token, and stores them securely. You're redirected straight back to the Macha connector. No copy-pasting tokens, ever.
Step 4: Which Zendesk tools can your agents use once connected?
Back in Macha, the Zendesk connector now shows as connected. This is where the connector earns its keep: it exposes a full set of tools your agents can call on a live ticket. You decide which ones are on.

The Zendesk connector ships 17 tools, grouped by what they do:
| Group | Tools |
|---|---|
| Read | Get Ticket, Get Custom Fields, Read Attachment (text from PDF/DOCX/XLSX/CSV and AI vision on images), Search Tickets, Search Users, List Groups |
| Write replies | Add Public Reply, Add Internal Note |
| Update the ticket | Update Status, Update Subject, Update Priority, Update Type, Update Tags (adds/removes without overwriting), Update Fields (validates dropdowns and dates) |
| Route | Assign Ticket (to an agent and/or group queue) |
| Knowledge | Search Articles (semantic search over your Help Center), Sync Knowledge Base |
A couple of these are gated for safety. High-impact write tools like Add Public Reply and Update Status show an activation confirmation modal when you toggle them on. The friction is deliberate, so you never let an agent post to customers before you mean to. Read tools are safe to leave on from the start.
Step 5: Should you turn on Help Center sync?
Yes, in most cases. The single highest-leverage switch on the Zendesk connector is Sync Knowledge Base. Flip it on and Macha syncs your Help Center articles into its knowledge base as a live source, kept current with webhook updates. When your agents answer a "how do I…" ticket, they draw on the same articles your customers see, and edits in Zendesk Guide flow through automatically.
Which Zendesk triggers can run agents automatically?
With the connector live, you can point a trigger at Zendesk so agents run autonomously instead of waiting for a human to invoke them. The connector exposes eight:
- New Ticket: fires on the first customer message, before any agent replies (the classic deflection and triage entry point).
- Customer Reply: fires on every customer comment on any ticket.
- Status Changed, Priority Changed, Ticket Assigned, Ticket Closed: lifecycle events you can hook automations to.
- Messaging: WhatsApp, Messenger, Instagram, LINE, Telegram, and web chat.
- Custom Webhook: generates a URL you attach to your own Zendesk trigger in Admin Center, for exact control over which tickets fire.
Here is how the layer-on-top model works in practice: a New Ticket trigger fires, your agent reads the ticket and its custom fields, checks the Help Center, drafts or posts a reply, sets tags and status, and routes to the right group, all through the tools you just enabled, inside your existing Zendesk. See the Macha on Zendesk page for the full picture, or the Connectors docs for the reference.
What happens when you need to reconnect?
OAuth grants don't last forever, and admins occasionally revoke access. When that happens you don't rebuild anything. The connector modal has a Reconnect button that re-authenticates in place. It keeps the same connector ID, so it doesn't strip your tools or break the agents that depend on them, and the re-auth path preserves existing credential fields like webhook IDs and signing secrets rather than replacing the whole record. A reconnect is a 30-second click, not a re-setup.
What usually goes wrong when connecting Zendesk?
OAuth is the easy path, but watch for these:
- You must be a Zendesk admin. Non-admins can't approve the grant. This is the number-one reason a connection stalls, so line up the admin before you start.
- Subdomain, not full URL. Enter
acme, nothttps://acme.zendesk.com. The wrong value sends you to the wrong (or a nonexistent) authorization page. - Onboarding vs. Connectors. The first-run onboarding may connect Zendesk via API key for simplicity. For a production connection on the default OAuth path, use the Connectors screen as shown here. To move an early API-key connection to OAuth, reconnect from the connector modal.
- Multiple brands or instances. Macha lets you link more than one Zendesk account, and each instance gets its own connection and credentials. Connect them one at a time; don't try to authorize two subdomains in a single pass.
- Tools default to safe. Don't expect an agent to post public replies the moment you connect. The write tools that touch customers need an explicit confirmation toggle. Turn them on when you've tested the agent, not before.
How much does connecting Zendesk to Macha cost?
Connecting Zendesk is free; there's no per-connector charge. What you pay for is the work your agents do once connected, billed per ticket: one conversation, however many messages, drafts and tool calls it takes to finish, is charged once. Plans start at $299 a month for 750 tickets, about $0.40 each. That price includes the setup: once you've connected, the Macha team analyzes your past tickets, builds the knowledge base and the first agent, and runs it in safe mode, with drafts as internal notes in Zendesk, until the drafts are right. It also covers a dedicated success manager who handles your changes afterwards: new categories, instruction changes, new tools. Connecting and syncing your Help Center costs nothing on its own. See the pricing page for the ticket tiers.
FAQ
Do I need to create an OAuth client in Zendesk first? No. Macha uses a Zendesk-approved global OAuth client, so you skip the Admin Center → APIs → OAuth clients setup entirely. You just authorize.
Do I still need an API key? Not for the default flow. OAuth replaced API key auth as the default for new Zendesk connections in April 2026. API key auth still exists (and the simplified onboarding flow may use it), but the Connectors screen uses OAuth.
Who can connect Zendesk? A Zendesk admin, because the authorization-code grant needs an admin to approve access on Zendesk's consent screen. You don't need admin rights in Macha beyond being able to manage connectors.
Will my tokens expire and break things? Macha refreshes the OAuth access token automatically, before expiry and as a fallback on a 401, with per-subdomain locking so concurrent refreshes don't conflict. If a grant is revoked, use Reconnect to re-authorize in place without touching your agents.
Can I connect more than one Zendesk account? Yes. Link multiple Zendesk instances; each gets its own connection and credentials. Connect them one at a time.
What does Macha get access to? Reading tickets, custom fields, and attachments; posting replies and notes; updating status, priority, type, tags, and fields; assigning and routing; and searching and syncing your Help Center. You choose which tools are enabled, and high-impact write tools need an explicit confirmation to switch on.
Does Macha only work with Zendesk? No. Macha runs on Zendesk, Freshdesk, Gorgias, Front, HubSpot or Intercom, and each help desk has its own connector in the same Connectors screen.
How do you get started?
If Zendesk is where your support lives, this five-minute step turns it into something your AI agents can act on. Start a free trial ($50 of usage, no credit card required), open Connectors, pick Zendesk, and authorize. Connecting is the whole of your setup part; the Macha team builds the first agent for you, on the trial and every plan. If you'd rather build it yourself, read the Zendesk integration overview or the Connectors docs to wire up your first trigger.
Written by Abbas (Customer Support & AI, Macha) · Reviewed by Ankeet Guha (Co-founder & CTO) · Published 2026-06-24 · Last updated 2026-09-24.
Sources