 Zendesk
 Freshdesk
 Gorgias
 Front
Front Shopify
 Stripe
 Slack
Slack Notion
 Google Workspace
 Confluence
How to Integrate Zendesk with Shopify (Step by Step)


If your support team runs on Zendesk and your store runs on Shopify, the Zendesk Shopify integration closes the gap that wastes the most agent time: looking up orders. Connect the two and your agents see a customer's Shopify order data — order status, fulfillment, tracking, payment, refunds — right in the ticket sidebar, without ever leaving Zendesk or alt-tabbing into the Shopify admin. They can even refund and cancel orders from inside the ticket. This guide walks through setting it up, step by step, using the official integration built by Zendesk (it's free), with every step verified against [Zendesk's own documentation](https://support.zendesk.com/hc/en-us/articles/4408820093850-Setting-up-the-Shopify-integration-for-Support-and-Chat).

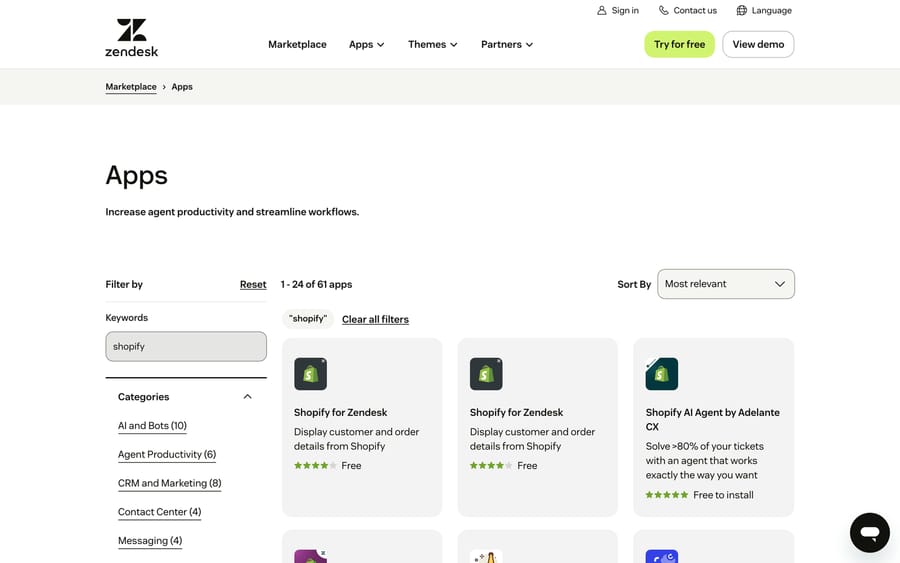
One thing to settle up front, because there are several Shopify apps in the Zendesk Marketplace: this guide covers the official "Shopify for Zendesk" app, made by Zendesk itself. Third parties (Zenplates, helphouse.io, agnoStack and others) publish their own, often paid, Shopify connectors with extra features — but the first-party one is free and covers what most stores need. Every label below is taken from Zendesk's current docs; Zendesk and Shopify both revise their UI periodically, so confirm the exact wording in your own account.
Why connect your store to your support desk
Before the steps, it's worth being clear on what you actually get — because "integrate Zendesk with Shopify" can mean several things.
- Order context in the ticket. The headline benefit. When a customer emails "where's my order?", the agent sees that customer's recent Shopify orders inside the ticket — order number, date and value, payment status, fulfillment status, and tracking numbers — instead of copy-pasting an email into the Shopify admin to search. Zendesk's own framing is that the app lets agents view order information "without leaving Zendesk," reducing context switching.
- Refund and cancel actions. With one checkbox enabled, agents can process refunds and cancellations on a Shopify order from inside the ticket — full or partial, with restock and shipping options.
- Multi-store support. If you run more than one Shopify storefront (separate brands, regions, or markets), you can connect each one and agents see the right store's data per customer.
- Optional storefront Web Widget. The same integration can drop a Zendesk Web Widget (the Classic Web Widget) onto your Shopify theme, so shoppers can start a conversation from the store itself.
If you're new to how tickets work in the first place, our explainer on the Zendesk ticketing system covers the object this order data attaches to. The Shopify data shows up as a panel alongside the normal ticket — it doesn't change how the ticket itself behaves.
Before you start: requirements and permissions
A few prerequisites save you a mid-setup detour. Per Zendesk's setup docs:
- A supported Zendesk plan. The integration is available on all Zendesk Suite plans (Team, Growth, Professional, Enterprise, and Plus) or on Support (Team, Professional, Enterprise). If you're on a Support plan, you also need Chat enabled to use it.
- Admin access in both products. You need administrator permissions in both Shopify and Zendesk to connect them — installation touches settings on each side.
- Shopify or Shopify Plus. The official app works for both standard Shopify and Shopify Plus, so the plan tier on the store side isn't a blocker.
- The app is free. "Shopify for Zendesk" costs nothing to install from the marketplace — you're only paying for your underlying Zendesk plan, not the connector.
Once connected, the Shopify integration shows up in Admin Center → Apps and integrations, where you manage it alongside your other Zendesk apps and integrations. The screenshot below is that real admin screen (note the Shopify app listed among the installed apps); the install itself begins on the Shopify App Store side, after which you authorize and name the connection inside this Admin Center area — that's also where the context-panel and refunds settings live.
Step 1 — Install the app and connect your Shopify store
For the official integration, installation starts on the Shopify side and finishes in Zendesk. Following Zendesk's documented flow:
- Open the Zendesk app in the Shopify App Store (apps.shopify.com/zendesk) and click Install.
- Select the storefront you want to install it on, and confirm the installation.
- Enter your Zendesk subdomain (the
yourcompanypart ofyourcompany.zendesk.com) and Submit. - You're redirected into Zendesk Admin Center. Enter a Connection name for this integration — pick something recognizable if you'll connect more than one store (e.g. "US Store") — and click Connect.
That's it for the handshake. The Zendesk app is automatically installed into your Shopify storefront, and you land back in Admin Center ready to configure what agents see. Because authorization happens through Shopify's own install flow, you're not pasting API keys by hand — Shopify grants the app access during installation.
Step 2 — Turn on the sidebar app (the order context panel)
Connecting the store doesn't automatically show order data in tickets — you enable the sidebar app that renders it. In Admin Center:
- Go to Apps and integrations → Integrations → Integrations.
- Click Shopify.
- On your storefront's card, click Configure.
- In the left sidebar, choose Sidebar app.
- Click Configure on the relevant card — there's one for Support and one for Chat.
- Check the Sidebar app checkbox to display it, and Save.
Once saved, the Shopify panel appears in the ticket interface (the Agent Workspace) and in Chat. This is the panel agents will actually live in, so it's worth opening a real ticket afterward to confirm it renders — which we'll do in the final step.
Step 3 — Decide what order data agents see (and how matching works)
There's no long list of toggles for individual fields — the app shows a consistent, useful set of order data, and the important thing to understand is how it finds the right orders.
How customer matching works. The integration matches the ticket requester's email address or phone number to the email or phone on Shopify orders and accounts. There's one catch that trips people up: Shopify data only displays on a saved ticket. The ticket has to be saved with a requester first so the app has an identity to look up — on a brand-new unsaved ticket, the panel will be empty. (In Chat, the visitor's provided contact details are matched the same way.)
What the panel shows. Per Zendesk's usage docs, the sidebar shows an order summary and a list of orders by order number. Expanding an order reveals:
- Order date and value
- Customer notes
- Payment status
- Fulfillment status
- Shipment tracking numbers
Click Order details on any order for more — line items, order notes, and a payment breakdown. That's enough for an agent to answer the overwhelming majority of "where's my order / did it ship / what did I pay" questions without leaving the ticket.
Step 4 — Optionally enable refunds and cancellations
This is the difference between a read-only lookup and an action panel. Refunds and cancellations are off by default and must be explicitly enabled — and only for Support (this is a write action, so treat it deliberately).
In the same Sidebar app configuration for the Support card, check the Refunds and cancellations checkbox, then Save. Once on, agents can act on orders directly:
- Refunds work on both unfulfilled and fulfilled orders. For unfulfilled orders, agents can refund specific line items. They can issue a full refund (selects all items and shipping, and returns stock), or a partial refund (choose quantities per line item), with checkboxes to restock items and refund shipping. Completing a refund automatically adds a
shopify_refundtag to the ticket. - Cancellations are more limited: only unfulfilled orders can be cancelled. The agent picks a refund reason and confirms, and the app adds a
shopify_cancelledtag.
Those auto-applied tags are genuinely handy — you can build Zendesk views or reporting around shopify_refund and shopify_cancelled to track how much money agents are moving from the support desk.
Step 5 — Connect multiple stores (if you need to)
Running more than one Shopify storefront is common — separate brands, or a US and an EU store. The official app supports it; you just repeat the connection per store. The one easy-to-miss detail: log into the additional Shopify storefront first before you start, so the install targets the right one.
- Make sure you're logged into the additional Shopify storefront.
- In Admin Center, go to Apps and integrations → Integrations → Integrations → Shopify.
- Click New connection and follow the same install flow from Step 1 (install, subdomain, connection name).
Each connected store appears as its own configuration, and the sidebar surfaces the matching store's orders for a given customer. Name each connection clearly during setup — "Connection name" is the only thing distinguishing them later.
Step 6 — (Optional) Add the Zendesk Web Widget to your storefront
If you also want shoppers to start conversations from the store itself, the same integration can place the Zendesk Web Widget (Classic) on your Shopify theme. This is optional and separate from the order-lookup panel:
- In Admin Center, go to Apps and integrations → Integrations → Integrations → Shopify → Configure.
- Choose Web Widget in the left sidebar and turn on Enable Web Widget.
- Click Go to Shopify Theme Apps Editor.
- In Shopify's App embeds menu, activate the Web Widget, and save your theme changes.
A note on honesty here: that last part happens on the Shopify side, in the theme editor's App embeds panel — these are described from Zendesk's documentation rather than shown, since they live in your Shopify admin, not Zendesk. If you want a deeper walkthrough of the widget itself, see our guide to adding the Zendesk Web Widget.
Step 7 — Test the integration with a real ticket
Before you rely on it, run the loop end to end:
- Open a ticket from a known customer — someone whose email (or phone) matches a real Shopify order. Remember: the ticket must be saved with that requester before the Shopify panel populates, so save it if it's new.
- Check the sidebar. Confirm the Shopify panel lists their orders, and expand one to verify order date, value, payment and fulfillment status, and tracking appear.
- Open Order details on an order and confirm line items and the payment breakdown load.
- If you enabled refunds, test a small partial refund on a test order and confirm the
shopify_refundtag lands on the ticket. Test a cancellation only on an unfulfilled order. - Multi-store check (if applicable): open tickets from customers of each store and confirm the right storefront's data shows.
If the panel is blank, the usual culprits are: the ticket isn't saved yet, the requester's email/phone doesn't match any Shopify account or order, or the sidebar app checkbox wasn't ticked in Step 2. Retrace the matching step.
Permissions, limitations, and honest watch-outs
No integration is all upside. The ones worth knowing before you commit:
- It's read-rich but write-limited. Out of the box you get order visibility; the only write actions are refunds and cancellations, and cancellations only on unfulfilled orders. You can't, say, edit an order or change a shipping address from the panel.
- Matching is by email or phone. If a customer emails from a different address than they used to check out — a personal Gmail vs. a work address — the app won't find their order. This is the single most common "it's not working" cause, and it's inherent to how matching works, not a bug.
- Saved tickets only. Data won't appear on an unsaved ticket; the requester must be saved first.
- Admin on both sides. You can't complete setup without admin rights in both Shopify and Zendesk — line that up before you start.
- First-party scope vs. third-party apps. The official app is free and solid, but if you need richer e-commerce actions (subscriptions, complex multi-system order views, deeper write-backs), the paid third-party Shopify apps in the marketplace exist for a reason. Start with the free one and only reach for those if you hit a wall.
Where AI fits in
Here's the honest reason this integration matters more than it looks. "Where's my order?" is the single most common e-commerce support ticket — and once order data is connected to Zendesk, most of those questions are answerable from data the system already has. An agent can glance at the sidebar and reply in thirty seconds. But it's still thirty seconds, times hundreds of tickets a week, on a question that's almost always the same.
That's the seam where an AI agent earns its keep. Macha is an AI agent layer that runs on top of your existing Zendesk — it is not a help desk and not a Zendesk replacement. With Shopify order data flowing into the ticket, an AI agent can read the customer's question, pull the matching order's fulfillment and tracking status, and answer the order-status question automatically inside the ticket — escalating to a human, with full context attached, the moment something needs judgment (a lost package, a refund dispute, an angry tone). The repetitive "where's my order?" volume gets handled; your agents see the tickets that actually need a person. You can read more about how it plugs in on Macha on Zendesk.
The honest framing: it's another layer to configure, and it's only as good as the data and knowledge you connect to it. On cost, Macha bills per AI action — each automated step it takes, like reading an order, drafting a reply, or applying a tag — not per resolution, because most of the value is the work done along the way, not a tidy "closed" event. If your store's inbox is mostly the same order-status questions, that's exactly the volume a connected AI agent absorbs. You can try it with a 7-day free trial, no credit card required.
Frequently asked questions
Is the Zendesk Shopify integration free? Yes. The official "Shopify for Zendesk" app, built by Zendesk, is free to install. You only pay for your underlying Zendesk plan — the integration is available on all Suite plans and on Support plans (with Chat enabled). There's no separate charge for the connector itself.
How does Zendesk match a customer to their Shopify order? By email address or phone number. The app matches the ticket requester's email or phone to the email/phone on Shopify accounts and orders. One catch: the ticket must be saved with a requester first — the Shopify panel stays empty on an unsaved ticket. If a customer contacts you from a different email than they ordered with, the order won't be found.
Can agents issue refunds in Shopify from Zendesk? Yes, if you enable it. Tick the Refunds and cancellations checkbox in the Support sidebar app configuration. Agents can then refund unfulfilled and fulfilled orders (full or partial, with restock and shipping options) and cancel unfulfilled orders, all from inside the ticket. Completed actions auto-tag the ticket shopify_refund or shopify_cancelled.
Can I connect more than one Shopify store? Yes. Log into the additional storefront first, then in Admin Center go to Apps and integrations → Integrations → Integrations → Shopify → New connection and repeat the install flow. Give each connection a clear name; each store's orders surface for the matching customers.
What order information shows in the Zendesk sidebar? A list of orders by order number, each expandable to show order date and value, customer notes, payment status, fulfillment status, and shipment tracking numbers. Clicking Order details reveals line items, order notes, and the payment breakdown.
Do I need Shopify Plus? No. The official integration works with both standard Shopify and Shopify Plus, so you don't need the Plus tier to connect it.
The bottom line
Integrating Zendesk with Shopify is a short, well-defined sequence: install the free official app from the Shopify App Store and authorize it with your Zendesk subdomain and a connection name, turn on the sidebar app so order data appears in tickets, understand that matching is by email/phone on saved tickets, optionally enable refunds and cancellations, connect additional stores if you run them, and test with a real customer's ticket before you rely on it. The payoff is that your agents stop alt-tabbing into the Shopify admin to answer "where's my order?" — the order's status, fulfillment, and tracking are right there in the ticket. And once that data is connected, it's the natural foundation for letting an AI agent handle the repetitive order-status volume automatically. For how Zendesk tickets themselves work, see our Zendesk ticketing system explainer.
Setup steps verified against Zendesk's official documentation, June 2026. Zendesk and Shopify update their products periodically — confirm labels in your own account before relying on them.


