How to Build Your First Zendesk Trigger (Step by Step)


A trigger is the single most useful thing a new Zendesk admin can learn to build. It's the rule that auto-replies to a customer the second they email in, drops a billing ticket into the Billing queue, or bumps a VIP's request to Urgent before anyone's read it — all with no one clicking a button. If you've only ever worked tickets by hand, building your first trigger is the moment Zendesk stops feeling like a glorified inbox and starts working for you.

This is the hands-on, click-by-click guide to creating a trigger in Zendesk — verified step by step against Zendesk's own documentation and built in a live admin account. We'll follow one concrete, useful example the whole way through, then cover the run-order rule that trips up almost everyone, how to test your trigger on a real ticket, and how to debug it when it doesn't fire.
If you want the concepts first — what a trigger is, how conditions and actions work under the hood, the default triggers Zendesk ships with — read Zendesk triggers explained, the companion deep-dive. This post assumes you just want to build one.
The example we'll build
To keep things concrete, we'll build a single, genuinely useful trigger from start to finish:
When a ticket comes in from a VIP customer, set its priority to Urgent, assign it to the Priority Support group, and notify that group so they jump on it.
It's a perfect first trigger because it touches every part of the process — a condition that identifies the VIP, multiple actions, a notification, and a real run-order consideration. Swap in your own field names and you've got a routing rule you can ship today.
A quick prerequisite: this example assumes you have a way to identify a VIP — most teams use a vip tag (added manually, by another trigger, or via the customer's organization) or a custom Organization field. We'll key off the vip tag. You'll also want a group to route to (here, "Priority Support"). Create those first if they don't exist.
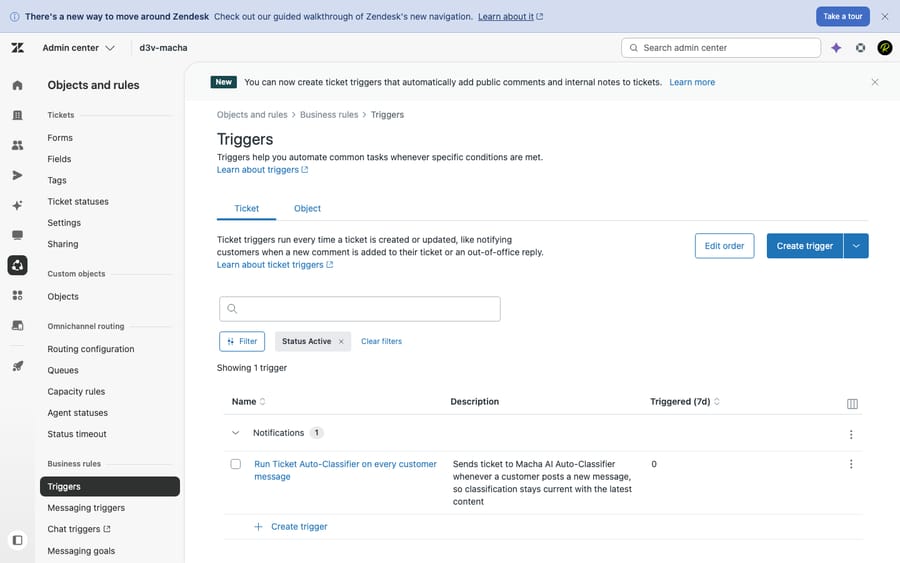
Step 1 — Open the Triggers page
In Zendesk, triggers live in the Admin Center, not the agent workspace. Here's the exact path (verified June 2026):
- Click the gear icon (or your profile menu) and open Admin Center.
- In the left sidebar, click Objects and rules.
- Under Business rules, click Triggers.
- Make sure you're on the Ticket tab at the top (Zendesk also has object triggers for custom objects — that's a different feature; for ticket automation you want the Ticket tab).
- Click Create trigger in the top-right.
You'll land on a blank trigger form. Everything from here happens on this one page.
Step 2 — Name it and pick a category
Two quick fields up top, and they matter more than they look:
- Name. Be specific and consistent. "VIP — set Urgent + route to Priority Support" beats "VIP trigger." Future-you, scanning a list of 40 triggers, will thank present-you. A simple convention —
Purpose — what it does— keeps the list readable. - Description (optional). One line on what the trigger does and why. Zendesk makes descriptions searchable, so a good one pays off when you're hunting for "the thing that sets priority" six months from now.
- Category. Zendesk groups triggers into categories. Select an existing one or create a new one (e.g. "Routing & escalation"). Categories are purely organizational, but on a growing instance they're the difference between a tidy list and chaos.
Step 3 — Set the conditions (Meet ALL vs. Meet ANY)
Conditions are the "if" — the qualifications a ticket must meet for the trigger to fire. Click Add condition and you'll see two separate blocks, and the difference between them is the thing that confuses almost every beginner:
- Meet ALL of the following conditions = AND logic. Every condition here must be true.
- Meet ANY of the following conditions = OR logic. At least one condition here must be true.
When you use both blocks, the trigger fires only when (all of the ALL conditions are true) AND (at least one of the ANY conditions is true). This is straight from Zendesk's ALL-vs-ANY reference, and it's worth re-reading: ALL is a gate that must fully pass; ANY is a gate that needs just one match.
For our VIP example, add these under Meet ALL:
- Ticket | is | Created — so it only fires on brand-new tickets, not on every later update.
- Tags | Contains at least one of the following |
vip— the marker that identifies a VIP customer.
That's it: a newly created ticket carrying the vip tag. If you wanted to also catch your "Enterprise" organization or the vip tag, you'd move those into the Meet ANY block instead — "either of these counts."
The most common reason a trigger never fires is a condition mistake here: leaving "Ticket is Created" off (so it also tries to fire on updates and behaves oddly), or putting conditions in ANY when you meant ALL. When debugging later, this is the first place to look.
Step 4 — Add the actions
Actions are the "then" — what the trigger does when its conditions match. Click Add action for each one. A single trigger can perform several actions in one fire, which is exactly what we want here. Add:
- Priority | Urgent — escalate it.
- Group | Priority Support — route it to the right team.
- Notify by → Group | Priority Support, with a short subject and body (e.g. "New VIP ticket #{{ticket.id}} — {{ticket.title}}") so the team gets pinged immediately. Zendesk placeholders like
{{ticket.id}}fill in the live ticket details.
Order your actions logically: set fields first (priority, group, tags), then notify last, so the notification reflects the ticket's final state rather than a half-processed one. (Within a single trigger Zendesk applies the actions together, but keeping the habit makes your triggers readable and matches how run order works across triggers — see Step 6.)
Step 5 — Save it
Click Create trigger at the bottom. Note the small dropdown arrow next to the button: it lets you save the trigger as Inactive if you want to set it up now and switch it on later. For a first trigger you're confident in, just Create — it goes live immediately and will act on the very next matching ticket.
Step 6 — Mind the run order (this is the part people miss)
Here's what separates a clean Zendesk instance from a baffling one. Triggers run top to bottom, in the exact order they appear in your Triggers list. Your new trigger drops to the bottom by default. You can drag triggers to reorder them on the Triggers page, and order has real consequences.
Why? Because one trigger's actions can change a ticket in ways that affect whether a later trigger fires. Zendesk calls this cascading and states it plainly: "Actions applied by one ticket trigger can affect how other triggers run and fire for a ticket." A concrete case with our example:
- Suppose another trigger, higher in the list, adds the
viptag based on the customer's organization. - Our VIP trigger, lower down, fires on that
viptag.
Because the tag-setter runs first, the tag exists by the time our trigger is evaluated, so it escalates correctly. Flip the order — our trigger above the tag-setter — and ours runs before the tag exists and does nothing. Same two rules, opposite outcome, purely from position.
Zendesk also re-evaluates the whole list after any pass in which something fired, looping until a full pass completes with no new firing. That's powerful, and it's also how you accidentally build a loop (more in the concepts guide). The reliable convention:
- Setup triggers first — stamp tags, normalize fields (e.g. "set no-priority to Normal").
- Routing & escalation next — like our VIP rule, which depends on those tags/fields.
- Notifications last — so customers and agents are alerted based on the ticket's final state.
Drag your new VIP trigger so it sits after anything that sets the vip tag and before generic notification triggers.
Step 7 — Test it on a real ticket
Never trust a trigger you haven't watched fire. The fastest test:
- Create a test ticket that matches your conditions — for our example, a new ticket with the
viptag (add it manually if needed). Submitting as a real new request via your support email is the most realistic check. - Watch what happens. The priority should flip to Urgent, the Group should change to Priority Support, and the group should get the notification email.
- Also test a ticket that shouldn't match (no
viptag) and confirm the trigger leaves it alone. Half of testing is verifying it doesn't fire when it shouldn't.
Step 8 — Check the events log if it didn't work
If the trigger didn't do what you expected, the ticket events log is your best friend. Open the test ticket, find the conversation/events menu (the "…" or events icon in the ticket header), and switch to Events — it shows, in order, exactly which triggers fired on that ticket and what each one changed.
One important caveat, straight from Zendesk's docs: **the event log only records a trigger's actions if they result in a net change in ticket field values.** If your trigger "fired" but set priority to a value the ticket already had, you may not see it logged — that's expected, not a bug. Quick troubleshooting checklist when a trigger misbehaves:
- It never fired: re-check conditions (Step 3) — usually a missing "Ticket is Created," or ANY-vs-ALL confusion, or a tag that isn't actually on the ticket.
- It fired but did nothing visible: the action may have set a value the ticket already had (no net change), or a later trigger overwrote it — check run order (Step 6).
- It fired too much / looped: an action is re-satisfying its own (or another trigger's) conditions on re-evaluation. Add an exit condition (e.g. add a
processedtag and require "tag is notprocessed").
Best practices and common mistakes
A few habits keep your triggers healthy as the list grows:
- Order: set fields → route → notify. Stamp tags and normalize fields first, route/escalate next, notify last. It mirrors how cascading works and keeps notifications accurate.
- Always add a stop condition to anything that updates a ticket. This is the single best defense against runaway loops. If a trigger edits the ticket, make sure its conditions can't be true again after it fires.
- Name and categorize everything. "Routing — VIP → Priority Support" beats "Trigger 12." Use categories so the list stays scannable.
- Test the negative case too. Confirm the trigger ignores tickets it shouldn't touch, not just that it catches the ones it should.
- Don't rebuild the defaults. Zendesk already ships triggers that auto-acknowledge new tickets and notify assignees. Building a second "new ticket auto-reply" means customers get two emails — check the existing list first (we cover the defaults in triggers explained).
And the mistakes that bite new admins most often: misusing ALL vs. ANY (the #1 "why won't it fire?"), placing a routing trigger above the trigger that sets the tag it depends on, and forgetting that triggers fire on an event, not on a timer — if you need "wait 24 hours then remind," that's an automation, not a trigger. See automations vs. triggers for where the line sits, and Zendesk business rules explained for how triggers, automations, and macros fit together.
Where AI fits — when rules aren't enough
Triggers are excellent at deterministic plumbing, but they're fundamentally rigid if-this-then-that logic. Our VIP trigger fires on the literal vip tag — but a trigger can't read a message and realize "I've been a customer for five years and this is urgent" is a VIP-grade escalation when no tag exists. It matches keywords; it can't weigh intent, nuance, or context. Every edge case you want handled has to be hand-coded as another condition, and the rule set gets brittle as it grows.
That's the gap an AI agent layer like Macha fills. Macha runs on top of your existing Zendesk — it's not a help desk and not a Zendesk replacement — and adds language understanding and judgment where rules run out: it can classify and route a ticket by meaning rather than keyword match, draft a reply, or resolve routine requests end to end, while anything it can't handle stays a normal ticket for a human. In practice the two work together: keep your triggers for the deterministic stuff (notifications, hard routing, SLA stamps) and let AI handle the fuzzy, language-heavy decisions triggers were never built for.
The honest framing: it's another tool to manage, and it's only as good as the knowledge and instructions you connect to it. Macha bills per AI action — any automated step it takes, costing roughly 0.5–9 credits depending on the model you choose — not per resolved ticket, because most automation is work done along the way rather than a single "resolution." If keyword-only triggers keep misrouting your nuanced tickets, that's the gap to close. You can try it free — 7-day free trial, no credit card required.
Frequently asked questions
How do I create a trigger in Zendesk? In Admin Center, go to Objects and rules → Business rules → Triggers, make sure you're on the Ticket tab, and click Create trigger. Give it a name and category, add conditions (the "if"), add actions (the "then"), then click Create trigger to save. The trigger goes live immediately and acts on the next matching ticket.
Where are triggers in the new Zendesk Admin Center? Triggers moved into Admin Center. Open Admin Center, click Objects and rules in the sidebar, then Business rules → Triggers. Ticket triggers (the kind most teams want) live on the Ticket tab; the Objects tab is for triggers on custom objects.
What's the difference between Meet ALL and Meet ANY conditions? "Meet ALL" uses AND logic — every condition in that block must be true. "Meet ANY" uses OR logic — at least one must be true. If you fill in both blocks, the trigger fires only when all of the ALL conditions are true and at least one of the ANY conditions is true.
Why isn't my Zendesk trigger firing? Almost always a condition problem: a missing "Ticket is Created," conditions placed in the ANY block when you meant ALL, or a tag/field that isn't actually on the ticket. Check the ticket's Events log to see which triggers fired and what they changed — but note Zendesk only logs a trigger's actions when they cause a net change in field values, so a "no-op" trigger may not appear.
Does the order of triggers matter? Yes, a lot. Triggers run top to bottom in your list, and one trigger's actions can change a ticket in ways that affect whether a later trigger fires (cascading). You can drag triggers to reorder them. A reliable convention: set fields first, route/escalate next, notify last.
Can a trigger run after a delay, like "wait 24 hours"? No. Triggers fire on an event — the instant a ticket is created or updated — and have no concept of time passing. For time-based rules ("if Pending for 4 days, send a reminder") you need an automation instead. See automations vs. triggers.
The bottom line
Building a Zendesk trigger is genuinely simple once you've done it once: open Admin Center → Objects and rules → Business rules → Triggers, click Create trigger, set your conditions (mind ALL vs. ANY), add your actions (set fields first, notify last), save, then drag it into the right run-order position and test it on a real ticket. The two things beginners underestimate are the ALL-vs-ANY logic and run order — get those right and most of your triage runs itself. When you hit the ceiling of what rigid if-this-then-that rules can do, that's where an AI agent layer takes over. From here, go deeper with Zendesk triggers explained, or step back to the business rules overview.
Build steps verified against Zendesk's official documentation and a live admin account, June 2026. Zendesk updates its product periodically — confirm specifics in your own account before relying on them.


