How to Set Up an Automation in Zendesk (Step by Step)


A Zendesk automation is a time-based business rule: instead of reacting the instant a ticket changes, it acts once time has passed — closing a solved ticket after four days, nudging a customer who hasn't replied in 24 hours, or escalating a ticket that's been sitting untouched. They're one of the highest-leverage things you can set up in Zendesk, because they do work on their own schedule with nobody clicking anything. But they're also the rule most people get wrong the first time, in one specific way that quietly spams your customers (more on that in step 6).

This is the hands-on, do-it-now guide. We'll build a real automation end to end — the classic "close a ticket 4 days after it's solved" — and call out a second worked example along the way (send a follow-up and set a ticket to Pending if the customer hasn't replied in 24 hours). Every step and requirement below is verified against Zendesk's own documentation. If you want the concepts first — exactly how automations differ from triggers and when to reach for each — read automations vs. triggers in Zendesk; this post is the step-by-step. Both sit inside the broader world of Zendesk business rules.
Before you start: what an automation can and can't do
Three facts shape everything you're about to build, so internalize them up front:
- Automations are time-based, not event-based. They fire when a time condition comes true (e.g. "it's been 96 hours since this was solved"), not the moment a ticket changes. If you need something to happen the instant a ticket is created or updated, you want a trigger, not an automation.
- They run roughly once an hour, not in real time. Zendesk runs all automations, first to last, on a recurring cycle of about every hour. So an automation can fire up to an hour after its condition technically becomes true.
- They ignore closed tickets. The hourly pass only evaluates tickets that aren't Closed. A Closed ticket is the end of the line.
You'll also need admin permissions — automations live in the Admin Center, which agents without admin rights can't reach. With that in mind, here's the build.
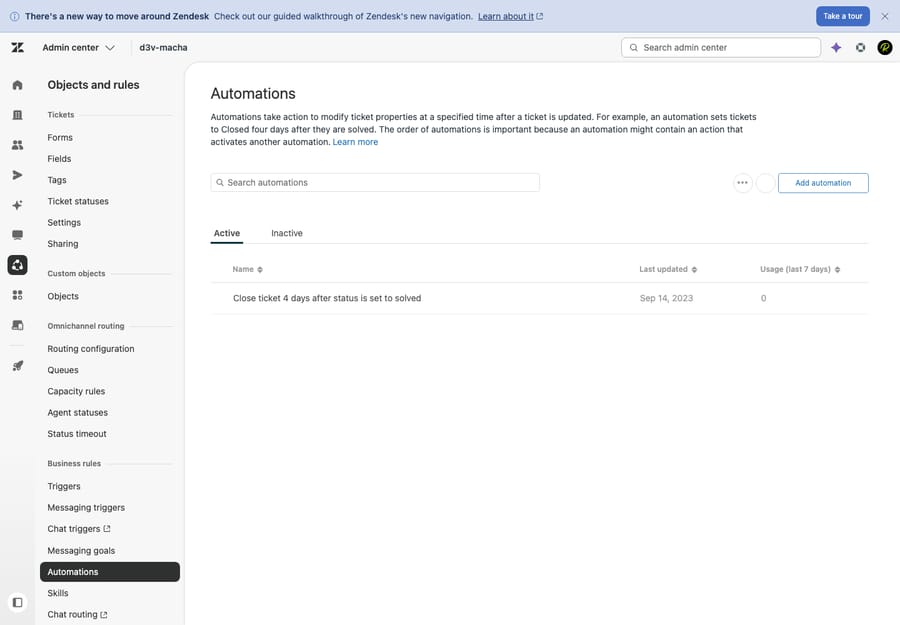
Step 1: Open the Automations admin
In Zendesk, go to the Admin Center (the gear icon, or your-subdomain.zendesk.com/admin). In the left sidebar, click Objects and rules, then under Business rules choose Automations. You'll land on a list of every automation in your account — including the defaults Zendesk ships with, like Close ticket 4 days after status is set to solved and a couple of pending-reminder examples.
The full path, which is worth memorizing because it's the same pattern for triggers and SLAs:
Admin Center → Objects and rules → Business rules → Automations
Click Add automation in the top-right to start a new one.
Step 2: Name it clearly
Give the automation a title that says exactly what it does and when. Future-you (and your teammates) will thank you. Good names read like a sentence:
Close ticket 4 days after solvedPending reminder — nudge customer after 24h no replyEscalate: Open + unassigned for 8 business hours
Vague names like "Automation 3" or "Reminder" are how accounts end up with twenty overlapping rules nobody dares touch. Be specific about the trigger condition and the action in the name itself.
Step 3: Add the time-based condition (the non-negotiable one)
This is the step that makes it an automation. Every automation must include at least one condition that measures elapsed time — without one, there's nothing for the hourly cycle to count toward, and the rule won't behave like an automation at all.
Under Meet ALL of the following conditions, add your time condition. Zendesk gives you time-elapsed conditions such as:
- Hours since solved (calendar or business) — for auto-close and post-resolution follow-ups.
- Hours since pending — for customer-reply reminders.
- Hours since created, Hours since open, Hours since assigned, Hours since update, and more.
For our worked example, add: Hours since solved (business) — Is — 96. That's four working days. (Zendesk's own default uses calendar hours; pick business hours if you only want the clock running during your support hours, calendar if you want it ticking 24/7.)
The "is" vs. "greater than" nuance: using Is — 96 means the automation acts during the single hourly pass when the ticket crosses the 96-hour mark. Pairing it with a nullifying action (step 6) is what guarantees it only runs once. Some admins use greater than instead and rely entirely on a status change or tag to stop the re-run — either works, but you must have that off-switch.
Step 4: Add your other conditions
Time alone is rarely enough — you want to scope the rule to the right tickets. Add the supporting conditions that narrow it down. For the auto-close example:
- Status — Is — Solved (only close tickets that are actually solved).
- Optionally Status — Less than — Closed, which Zendesk's default close automation uses to make sure it's targeting solved-but-not-yet-closed tickets.
For the pending-reminder example, your condition set would instead be:
- Status — Is — Pending
- Hours since pending (business) — Is — 24
- Tags — Contains none of the following —
reminder_sent(this is the off-switch from step 6 — it keeps the reminder from going out twice).
Use Meet ALL for conditions that must all be true, and Meet ANY for "any one of these" logic — same builder you'll recognize from triggers.
Step 5: Add the actions
Now tell Zendesk what to do when the conditions are met. Under Perform these actions, add them. For auto-close:
- Status — Closed.
For the pending reminder, the actions would be:
- Email user — (requester), with a polite "just checking in on your request" message.
- (Optionally) Status — Pending to keep it waiting on the customer.
Actions mirror what triggers can do — set fields, change status, add tags, notify people, send emails. The difference is purely when they run.
Step 6: Add the off-switch so it doesn't re-run every hour
This is the step everyone forgets, and it's the one that matters most. Because the automation re-checks every non-closed ticket every hour, a rule whose conditions stay true will fire over and over — emailing the same reminder to a customer hour after hour after hour. Zendesk even refuses to save an automation that can't stop itself.
The rule, in Zendesk's exact words, is that each automation must include at least one of:
- an action that cancels a condition after the conditions are met, or
- a condition that can only be true once.
In plain terms: the automation has to change something about the ticket so that, on the next hourly pass, the ticket no longer matches its own conditions.
- For auto-close, this is automatic: the action sets the ticket to Closed, and closed tickets are excluded from future passes. The off-switch is built in.
- For the pending reminder, it isn't automatic — so you add the off-switch yourself with a tag. The standard pattern:
- Condition: Tags — Contains none of the following —
reminder_sent(added in step 4). - Action: Add tags —
reminder_sent(add this now in step 6).
After the reminder fires once, the ticket has the reminder_sent tag, so it fails the "contains none of" condition on every future pass and is skipped. It fires exactly once. Forget this tag and you've built a customer-spam machine — this is the single most common Zendesk automation mistake.
Step 7: Save it
Click Create automation (Zendesk's save button on a new automation). If you've left out a time condition or an off-switch, Zendesk will warn you before it lets the automation go live — that's the product enforcing the two rules above.
Your new automation now sits in the list alongside the defaults. Order matters: because automations run first-to-last every hour, drag yours to the right position if it needs to act before or after another rule.
Step 8: Understand the cadence (it's not instant)
Don't expect your automation to fire the second its condition is met. Zendesk sweeps your non-closed tickets about once an hour, running every automation in order. Practical consequences:
- A "close 4 days after solved" ticket might actually close 4 days and 40 minutes after it was solved. That's normal.
- If you need split-second timing, an automation is the wrong tool — use a trigger.
- The cycle only touches non-closed tickets. Anything already Closed is never re-evaluated.
There's also a ceiling worth knowing: Zendesk allows a maximum of 500 active automations at once, so keep them lean rather than building a near-duplicate for every edge case.
Step 9: Test it
You don't want to discover a broken automation by watching it email a hundred customers. To test safely:
- Create a test ticket that matches your conditions (for the reminder, set a dummy ticket to Pending; for auto-close, mark one Solved). For time conditions you can't fast-forward, temporarily lower the threshold — e.g. set Hours since pending — Is — 1 — confirm it fires correctly, then change it back to 24.
- Wait for the next hourly cycle (or up to an hour) and check the ticket's events. Open the ticket and view its events/audit log — you'll see the automation listed by name where it acted, which confirms it ran.
- Verify the off-switch worked: on the next hourly pass, the ticket should not be touched again. If the same action repeats, your nullifying condition/action is missing or misconfigured — go back to step 6.
Once it behaves on a test ticket, it'll behave on real ones.
Best practices
- Name every automation like a sentence — condition + action — so the list stays readable.
- Always build the off-switch first. Add the nullifying tag/condition before you add the email action, so you can never accidentally ship a rule without it.
- Prefer business hours for customer-facing timing so reminders don't go out at 3 a.m.
- Keep the rule set small and ordered. Overlapping automations can fight each other; a handful of clearly named, well-ordered rules beats fifty fragile ones.
- Document your tag vocabulary (
reminder_sent,escalated, etc.) so off-switch tags don't collide across rules. - Re-read automations vs. triggers whenever you're unsure whether something belongs on a clock or an event — picking the wrong one is the root cause of most "my rule never fires" tickets.
Common mistakes to avoid
- The infinite re-run trap. No nullifying action and no once-only condition = the automation fires every single hour. This is the classic Zendesk automation bug. The fix is always step 6.
- Forgetting the time condition. An automation with no elapsed-time condition won't validate or won't behave — there's nothing for the hourly cycle to count.
- Expecting it to be instant. It can lag up to ~an hour. If timing must be exact, use a trigger instead.
- Targeting closed tickets. Automations skip Closed tickets entirely, so a rule that "should" act on them never will.
- Confusing automations with macros. A macro is a manual, one-click bundle an agent applies on demand — despite the name, it's not automatic. Automations run themselves.
- Building a "trigger" that needs to wait. If your rule is really "after 2 days, do X," a trigger can't do it — there's no event two days out. It has to be an automation.
Where AI fits once your rules are running
Automations and triggers are unbeatable at the predictable — "if this exact condition, after this exact time, do this exact thing." What they can't do is read a messy customer email, work out what the person actually needs, and write a useful reply. An automation can close a solved ticket on a timer, but it can't decide whether a ticket should be solved, or draft the answer that solves it.
That's the gap an AI agent layer like Macha fills. It runs on top of your existing Zendesk — it isn't a help desk and it isn't a replacement for one — handling the judgment calls your business rules can't: reading intent, triaging and tagging nuanced tickets, drafting replies for an agent to approve, and resolving routine requests end to end, while anything ambiguous stays a normal ticket for a human. The honest division of labor: keep your automations doing the deterministic, time-based plumbing they're great at, and let AI handle the parts that need understanding rather than a hard-coded condition.
On cost — which differs from rules, since automations and triggers are free — Macha bills per AI action (any automated step: summarizing, tagging, routing, drafting, or resolving, costing 0.5–9 credits depending on the model you choose), not per closed ticket, because most automation isn't a "resolution," it's work done along the way. If you want to see exactly where rules end and AI begins, we walk through it in how to automate Zendesk with AI. You can also try it free — 7-day free trial, no credit card required.
Frequently asked questions
How do I create an automation in Zendesk? Go to Admin Center → Objects and rules → Business rules → Automations, click Add automation, give it a clear name, add at least one time-based condition (e.g. "Hours since solved is 96"), add any other conditions and the actions to perform, include a nullifying action or once-only condition so it doesn't re-run every hour, then click Create automation. Automations run about once an hour on all non-closed tickets.
What is the required condition for every Zendesk automation? Every automation must include a time-based condition — one that measures elapsed time, like "Hours since solved," "Hours since pending," or "Hours since created." Without a time condition there's nothing for the hourly cycle to evaluate, so the rule won't function as an automation.
Why does my Zendesk automation keep running every hour? Because its conditions stay true on every hourly pass. Zendesk requires each automation to include at least one action that cancels one of its conditions (or a condition that can only be true once) so the ticket stops matching after it fires. The common fix is to add a tag like reminder_sent as an action and require that tag to be absent in the conditions.
How often do Zendesk automations run? Zendesk runs all automations, first to last, roughly once per hour on every ticket that isn't Closed. They are not real-time — an action can fire up to about an hour after its condition technically becomes true.
Do Zendesk automations run on closed tickets? No. The hourly automation pass only evaluates tickets that aren't Closed, so a Closed ticket is never acted on by an automation.
What's the difference between an automation and a trigger in Zendesk? A trigger is event-based — it runs the instant a ticket is created or updated. An automation is time-based — it runs on the hourly cycle once a time condition is met. Use triggers for instant reactions and automations for anything that should happen after a delay. Full breakdown in automations vs. triggers.
The bottom line
Setting up a Zendesk automation comes down to four things: open Admin Center → Objects and rules → Business rules → Automations → Add automation, add a time-based condition (the requirement that makes it an automation), add an off-switch so it can't re-fire every hour, and test on a dummy ticket before it touches real customers. Remember the cadence — it's hourly, not instant, and it ignores Closed tickets — and the infinite-re-run trap will never catch you. From here, get the concepts straight in automations vs. triggers, learn the event-based side in Zendesk triggers explained, or step back to the business rules overview to see how the whole system fits together.
Steps and requirements verified against Zendesk's official documentation, June 2026. Zendesk updates its product periodically — confirm specifics in your own account before relying on them.


