 Zendesk
 Freshdesk
 Gorgias
 Front
Front Shopify
 Stripe
 Slack
Slack Notion
 Google Workspace
 Confluence
How to Build a Knowledge Base in Zendesk Guide (Step by Step)


A knowledge base is the cheapest support agent you'll ever hire: write an answer once, and it deflects the same question thousands of times without ever clocking out. In Zendesk, that knowledge base lives in Guide, and the public site your customers actually visit is the Help Center. This guide walks through building one from a blank account to a live, searchable site — activate Guide, plan the structure, create your first category, sections, and articles, set who can see them, theme it, switch on search, and go live.

If you want the concepts first — what Guide is, how it's packaged, what each piece does — read the companion explainers: what Zendesk Guide is and the Zendesk Help Center explained. This post is the hands-on build. Every step below is verified against Zendesk's own documentation; Zendesk revises its UI periodically, so confirm labels in your own account.
Before you start: who can do what
Two roles matter here, and they're not the same person by default:
- The account owner is the only person who can enable Guide for the first time (Step 1).
- A Zendesk Support administrator is who activates the Help Center to make it public (Step 9), and Knowledge admins are the only people who can add, edit, or delete categories and sections.
So if you're not the account owner, you may need them for the very first switch-on, then an admin handles the rest. Regular agents can write and edit articles once permitted, but they can't restructure the category tree.
The rest of this guide assumes you have admin access. Where a plan tier gates a feature (like Team Publishing in Step 5), we'll flag it.
Step 1 — Activate Guide and open Knowledge admin
Your knowledge base is part of Zendesk, but it ships switched off. To turn it on:
- Sign in as the account owner.
- Click the Zendesk Products icon (the grid in the top bar) and choose Guide.
- On the welcome screen, click Get started.
Guide is now enabled, and your Help Center opens in setup mode — a private state where only you and your team can see it. This is the point of setup mode: you build everything in private and flip it public only when it's ready (Step 9). The control room for all of this is Knowledge admin, the back-office console where you manage structure, settings, and theming. The Help Center itself is the customer-facing storefront; Knowledge admin is the back office behind it.
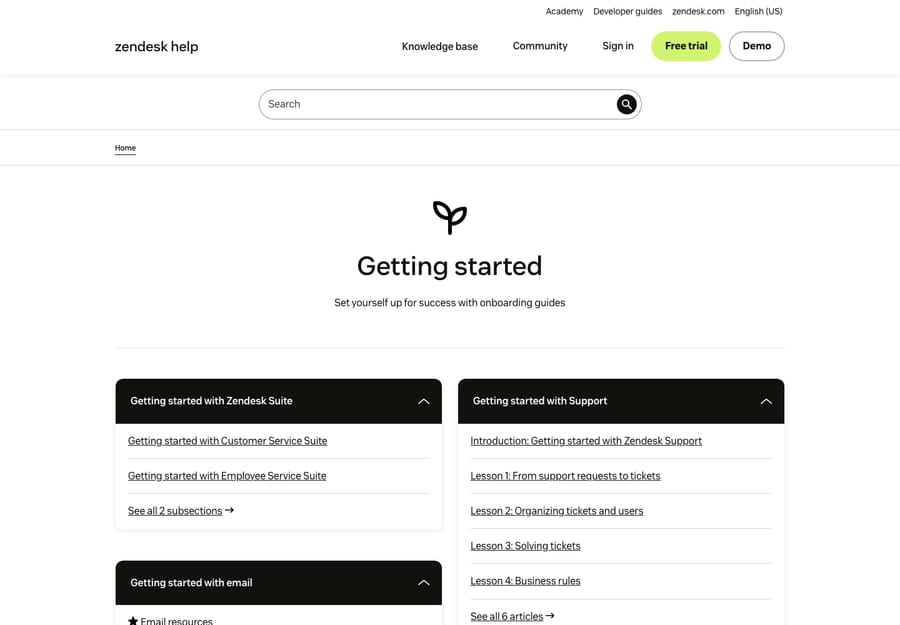
A note on screenshots: the Guide admin authoring screens are behind bot-verification on our test instance, so we describe them step by step rather than show fabricated captures. The customer-facing Help Center below is a real, live one.
Step 2 — Plan the structure: Categories → Sections → Articles
Do not start by typing articles. Start with the shape, because Zendesk's knowledge base is a strict three-level tree and retrofitting structure later is painful:
- Categories are the top-level buckets — the big tiles on your home page (e.g. Getting Started, Billing, Account & Security).
- Sections live inside categories and group related articles (e.g. Billing → Invoices, Billing → Refunds). Sections can nest up to five levels deep, with up to 200 sections per parent — plenty, but resist deep nesting; readers get lost past two levels.
- Articles are the actual help content, and they live inside sections.
One quirk worth knowing up front: if you create only one category, Zendesk hides that category from end users and shows them just its sections. So a tiny KB can feel flat and clean; you only get the big category tiles once you have two or more. Sketch your top 4–7 categories on paper first — that ten-minute exercise saves a reorganization later.

Step 3 — Create your first category
In Knowledge admin or the Help Center:
- Click Add in the top menu bar, then select Category.
- Enter a Name and an optional Description.
- Confirm the Source language is correct.
- (Guide Enterprise only) Pick a template if more than one is available.
- Click Add.
That's a category live. Repeat for each top-level bucket from your Step 2 plan. Remember: only Knowledge admins can create or edit categories, so this is admin work.
Step 4 — Create sections inside the category
Sections are what actually hold articles, so every category needs at least one:
- Click Add in the top menu bar, then select Section.
- Enter a Name and optional Description.
- Confirm the Source language.
- Under Order articles by, choose how articles will sort within the section (e.g. manually, or by recent activity).
- Under Hierarchy, pick the parent — the category (or another section) this one sits inside. This is the step that places the section in your tree.
- Click Add.
On a real Help Center, the result is exactly the nesting below: a category page listing sections, each containing its articles — the Category → Section → Article hierarchy made visible to customers.
Step 5 — Write your first articles
Now the content. To create one, click Add in the top menu bar and select Article. This opens the article editor — a rich-text editor with the usual headings, bold, lists, links, tables, images, and code formatting. A few things to do well here:
- Write the title as the question your customer types, not your internal jargon. "How do I reset my password?" beats "Credential recovery." That phrasing is what search (and any AI agent) matches against.
- Keep articles single-purpose. One article, one task. Three short articles beat one sprawling one — they rank better and they're easier to keep current.
- Reuse repeated content with content blocks. If your refund window or support hours appear in twenty articles, a content block lets you edit them once and update everywhere — no more hunting for stale copies.
Before you can save, you'll set the article's placement (which section manages it) and its basic management permissions (next step). You can then Save draft, Preview, or Publish. A draft is invisible to customers until you publish — so you can write freely without anything leaking live.
On Guide Professional and Enterprise plans, Team Publishing adds a review workflow on top of this: writers submit drafts, designated reviewers approve, and you can flag articles to be verified on a schedule so nothing silently goes stale. If you have a team of contributors rather than one writer, turn this on — it's the difference between a maintained KB and a graveyard of half-true articles.
Step 6 — Set who can view each article (permissions)
This is the step people skip and regret. Every article has viewing permissions that decide who can see it:
- Visible to everyone — anyone who lands on your Help Center, no sign-in required. This is the right setting for public, top-of-funnel help.
- Only visible to selected user segments — restrict the article to up to 10 user segments. The most common is Signed-in users (people who've created an account and logged in), but you can scope to specific segments for internal-only or customer-tier-only content.
Set this deliberately per article. The classic mistake is leaving an internal runbook — refund-approval thresholds, escalation scripts — set to "everyone." Decide public vs. signed-in before you publish, not after a customer screenshots it.
Separately, management permissions control which agents can edit and publish the article: Administrators (Knowledge admins only — the default on new articles) or Agents and admins (everyone can edit and publish). Loosen this only for content you trust your whole team to own.
Step 7 — Manage visibility: draft vs. published, and ordering
You now have two levers for what customers see:
- Draft vs. published — articles, sections, and categories only appear on the live Help Center once published. Keep work-in-progress as drafts; publish when it's ready.
- Ordering — within a section, articles sort by your Order articles by choice (Step 4) or a manual drag order; categories and sections can be arranged to control what appears first. Put your highest-traffic answers at the top. Customers (and search crawlers) read top-down, so order is a real lever, not a cosmetic one.
Step 8 — Theme the Help Center and turn on search
A knowledge base only deflects tickets if people can stand to use it and can find things in it.
- Branding/theme. The default Copenhagen theme is clean and works out of the box. Add your logo, brand colors, and (optionally) custom CSS/HTML so the Help Center looks like your product, not a generic Zendesk page. The full how-to lives in Zendesk Help Center themes.
- Search. Help Center search is on by default — the search bar at the top of the home page is the single most-used element on most KBs, which is exactly why article titles should match real queries (Step 5).
- AI / generative search (optional). On the right plans, Zendesk can show a generative "quick answer" that synthesizes a response from your articles above the blue links — and you can layer an AI agent on top to actually resolve questions from the same content. The better and more current your KB, the better these perform; they can only be as good as what you've written.
Step 9 — Go live (activate the Help Center)
Everything so far happened in private setup mode. To make it public:
- In Knowledge admin, click Settings in the sidebar.
- Under Help center settings, click Activate.
- Click Activate again to confirm.
Your Help Center is now live and visible to end users. (Remember: you must be a Support administrator to activate.) You don't need a hundred articles to launch — ship your top 10–15 answers, go live, and grow from real demand.
Content best practices that actually move deflection
Standing up the structure is the easy half. A KB earns its keep through the content habits behind it:
- Write for search intent, not your org chart. Title and structure articles around what customers ask, in their words. Internal category names ("Tier-2 Escalations") mean nothing to a confused user.
- Seed from your top tickets. The fastest way to a high-deflection KB is to pull your 20 most common ticket subjects and write an article for each. You already know these are real questions — your inbox proved it.
- Keep it current. A wrong article is worse than no article. Use Team Publishing's verification (Step 5) or a simple quarterly review to retire stale content. Date-sensitive details (pricing, hours, policies) belong in content blocks so one edit fixes them everywhere.
- One article, one job. Split sprawling articles; merge near-duplicates.
Common mistakes to avoid
- Too few articles. A KB with five articles deflects almost nothing. Aim for coverage of your real ticket distribution, not a token gesture.
- No owner. A knowledge base with no one accountable rots within months. Assign a named owner (even part-time) responsible for new articles and the review schedule.
- Everything set to "everyone" — or everything locked. Both extremes hurt. Match each article's viewing permission to its audience.
- Launching pretty but empty, or full but ugly. You need both enough content and findable, on-brand presentation.
Where an AI agent fits on top
Here's the quiet payoff of doing the above well: a clean, current knowledge base isn't just a self-service site — it's the fuel for AI deflection. When customers won't read the article (and many won't), an AI agent can read it for them, pull the exact answer from your content, and resolve the ticket conversationally — drawing on the same articles you just wrote.
That's the layer Macha adds on top of Zendesk — it's not a help desk and not a Zendesk replacement, it runs on your existing setup. You point it at the knowledge base you built here, and it answers from that content, escalating anything it can't confidently handle to a human with context attached. The honest caveat: it's only as good as the KB behind it, which is the whole reason to get Steps 5–7 right first. On cost, Macha bills per AI action — any automated step it takes, like drafting or sending a reply — not per closed ticket, because most automation isn't a clean "resolution," it's work done along the way. If you want to see it run on your own articles, you can 7-day free trial, no credit card required.
Frequently asked questions
How do I create a knowledge base in Zendesk? Enable Guide (account owner: Zendesk Products icon → Guide → Get started), which opens your Help Center in private setup mode. Then plan a Category → Section → Article structure, create a category and sections via Add in the top menu bar, write articles in the editor, set each article's viewing permissions, theme the site, and click Activate in Knowledge admin → Settings to go live.
What's the difference between Guide, the knowledge base, and the Help Center? Guide is the product — the back-office system where you write and manage content. The knowledge base is the content (categories, sections, articles). The Help Center is the customer-facing website that displays it. See Zendesk Guide explained and the Help Center explained for the full breakdown.
How is a Zendesk knowledge base structured? Three levels: Categories contain Sections, and Sections contain Articles. Sections can nest up to five levels deep (max 200 per parent), but two levels is plenty for most teams. With only one category, Zendesk hides it and shows just its sections.
How do I control who can see an article? Each article has viewing permissions: Visible to everyone (public, no sign-in) or Only visible to selected user segments (e.g. Signed-in users; up to 10 segments). Set this per article before publishing — it's how you keep internal content out of public view.
Do I have to make my knowledge base public right away? No. Guide opens in setup mode, visible only to your team, so you can build and theme it privately. It goes public only when a Support admin clicks Activate in Knowledge admin → Settings → Help center settings.
How many articles do I need to launch? Enough to cover your most common questions — ship your top 10–15 ticket-driven answers and go live, then expand from real search and ticket demand. A near-empty KB deflects almost nothing.
The bottom line
Building a Zendesk knowledge base is a clear sequence: enable Guide, plan a Category → Section → Article structure, create your categories and sections via Add, write single-purpose articles, set each one's viewing permissions, theme the Help Center and confirm search is on, then Activate to go live. The build is the easy part — the value comes from seeding articles from your real top tickets, keeping them current, and giving the whole thing an owner. Do that, and you've not only built a self-service site, you've built the foundation an AI agent can resolve tickets from. For the concepts behind it all, start with what Zendesk Guide is.
Build flow verified against Zendesk's official documentation, June 2026. Zendesk updates its product periodically — confirm labels in your own account before relying on them.


