How to Set Up Zendesk: A Step-by-Step Guide for New Admins


So you've been handed a fresh Zendesk account and a mandate to "get support running." The good news: Zendesk's defaults are sane, and you don't have to configure everything before you go live. The trick is doing the setup in the right order — get your team, channels, and a thin layer of automation in place first, then layer on the polish. This guide is the practical, do-it-in-an-afternoon walkthrough for a brand-new admin, organized as ten numbered steps. For each one you'll get what to do, why it matters, and a link to the deep-dive when you want to go further.

A quick mental model before we start: nearly everything in Zendesk exists to create, organize, or act on a single object — the ticket. If that word is new to you, skim the Zendesk ticketing system explained first; the ten steps below will make a lot more sense once you've seen how a ticket flows from channel to closed. The setup order here follows Zendesk's own Launch guide, verified June 2026.
Step 1 — Set up your account, then add team members and groups
What to do: Once your plan is active, head to Admin Center > People > Team. First create your groups under **Admin Center > People > Team > Groups > Add group** — these are the teams tickets get routed to, like Tier 1, Billing, or Technical. Then add people under **Admin Center > People > Team > Team members > Create team member, entering each person's name and email and assigning a role: agent (works tickets) or admin** (works tickets and configures the account). Build the groups first so you can drop each new agent straight into the right one.
Why it matters: Groups are the backbone of routing — you assign work, views, and macros to groups, not just individuals, so a clean group structure now saves you re-work later. On roles, Zendesk's own guidance is to keep admins to a small handful (roughly one to five); too many people with config access is how settings quietly drift. If you're on a plan with custom roles, you can also create a read-only light agent for stakeholders who need visibility but won't be solving tickets.
Go deeper: Zendesk roles and permissions explained · what is a Zendesk light agent
Step 2 — Connect your channels
What to do: Decide how customers will reach you, then wire up each channel in Admin Center > Channels.
- Email is almost always first. Add your support address under Admin Center > Channels > Talk and email > Email. You can use Zendesk's default
[email protected], but most teams forward their existing[email protected]into Zendesk and verify the domain so replies come from their own brand. - Messaging / Web Widget puts live chat and a persistent message thread on your site or app. Turn it on under Admin Center > Channels > Messaging and social > Messaging, then embed the Web Widget snippet on your site.
- Talk (voice) is optional — enable it only if you'll actually staff a phone queue. It lives alongside email under Admin Center > Channels > Talk and email > Talk.
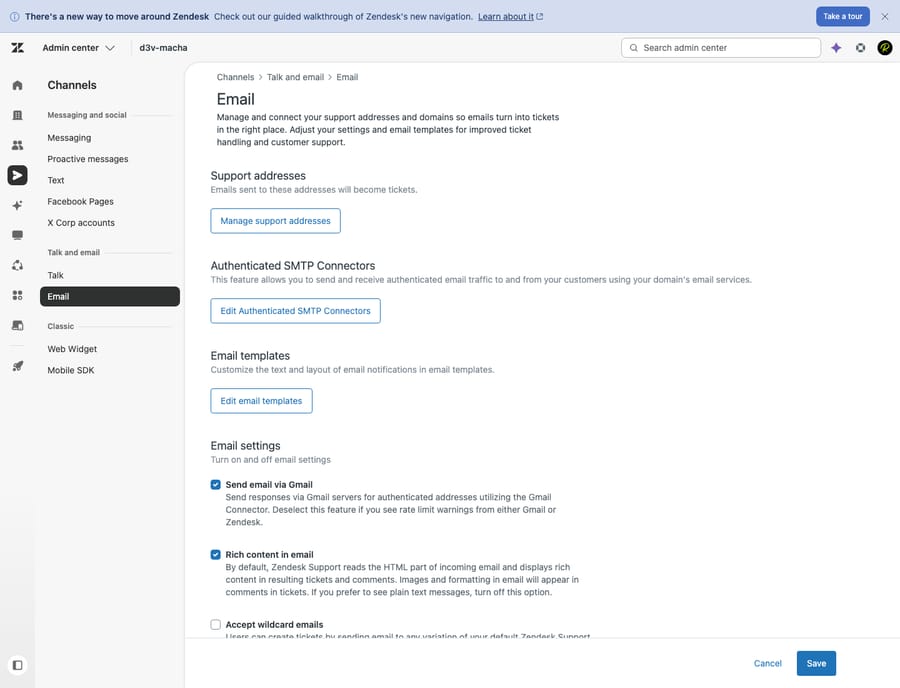
Why it matters: Every channel funnels into the same ticketing backbone, so you get one queue regardless of where the customer started. Don't boil the ocean: launch with email plus one real-time channel, and add the rest once the team has its footing.
Go deeper: the Zendesk Web Widget explained · Zendesk messaging vs. live chat · Zendesk Talk explained
Step 3 — Set up the Help Center (knowledge base) basics
What to do: Activate Guide and stand up a Help Center with a handful of articles answering your most common questions — billing, account access, returns, "how do I…". Open Guide from the product tray (the grid icon in the top bar) > Guide, then activate it and start adding articles; you manage Help Center settings and themes from inside Guide admin. You don't need fifty articles to launch; you need the top ten that your team answers over and over.
Why it matters: A knowledge base is the cheapest support you'll ever offer — customers self-serve, ticket volume drops, and (crucially) it becomes the source of truth that AI agents draw on later. Skipping this step is the single most common reason an AI rollout underwhelms: no knowledge in, no good answers out. Even a thin Help Center on day one pays for itself.
Go deeper: the Zendesk Guide knowledge base explained
Step 4 — Configure ticket fields and forms
What to do: Look at the standard ticket fields (subject, description, priority, type, status) under Admin Center > Objects and rules > Tickets > Fields and add custom fields for data your business needs to capture — order number, product line, plan tier, a dropdown of issue categories. If you handle very different request types (a refund vs. a bug report), build separate forms under Admin Center > Objects and rules > Tickets > Forms that show the right fields for each.
Why it matters: Fields are what every downstream feature reads from. A trigger can only route on priority = Urgent if priority is being set; a report can only break down by product if there's a product field. Capturing the right structured data at intake is what makes automation and reporting work — so think a step ahead here. Resist over-collecting, though: every required field is friction for the customer.
Go deeper: Zendesk ticket fields vs. forms · Zendesk custom fields explained
Step 5 — Build your business rules: triggers, automations, SLAs, and business hours
What to do: This is where Zendesk starts working for you. All four pieces live under Admin Center > Objects and rules > Business rules, and you only need a few of each to launch:
- Triggers (Admin Center > Objects and rules > Business rules > Triggers) run the instant a ticket is created or updated — auto-acknowledge new tickets, route by tag or channel, set priority. Start with two or three.
- Automations (Admin Center > Objects and rules > Business rules > Automations) run on a schedule (e.g. "if Pending for 4 days with no reply, send a reminder"). Add these once you see where tickets stall.
- SLAs (Admin Center > Objects and rules > Business rules > Service level agreements) set timed targets — first reply within an hour, resolution within a day — measured against fields like priority.
- Business hours / schedules (Admin Center > Objects and rules > Business rules > Schedules) tell your SLAs and automations when your team is actually working, so the clock doesn't run overnight. Note that schedules live with the other business rules under Objects and rules — not under Workspaces.
Why it matters: Business rules are the difference between a shared inbox and a support system. They enforce consistency no human has to remember, and they surface at-risk tickets before they slip. Set up business hours before SLAs, or your targets will be measured against a 24/7 clock you don't staff.
Go deeper: Zendesk business rules explained (the overview), then the hands-on guides — how to create a Zendesk trigger and how to set up Zendesk SLA policies. For the schedule itself, see Zendesk business hours and schedules.
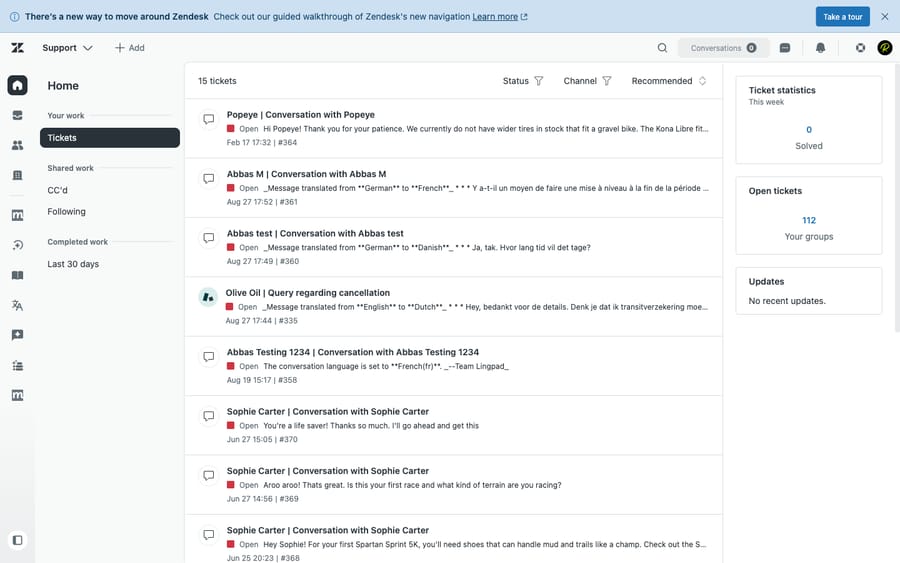
Step 6 — Create views to organize the queue
What to do: Build a few views — saved, filtered lists of tickets — so agents always know what to work on next. Start with the essentials: Unassigned tickets, My open tickets, Pending, and one per group (e.g. Billing — unsolved). You'll find these under Admin Center > Workspaces > Agent tools > Views.
Why it matters: Views are where agents actually live all day. Without them, everyone stares at one giant pile and the urgent stuff drowns. Good views turn an undifferentiated queue into a clear, prioritized to-do list — and they cost nothing but a few conditions.
Go deeper: Zendesk views explained
Step 7 — Set up macros for common replies
What to do: Create macros — saved bundles of pre-written text and field changes an agent applies in one click — for the replies your team sends most: "we've received your request," password-reset steps, refund confirmations. Build them under Admin Center > Workspaces > Agent tools > Macros; start with five to ten and refine them as patterns emerge.
Why it matters: Macros keep tone and accuracy consistent and cut handling time dramatically, without removing the human's judgment about when to use them. They're also the lowest-risk automation you can ship on day one — nothing fires on its own, an agent stays in control.
Go deeper: Zendesk macros explained · the step-by-step how to create a macro in Zendesk
Step 8 — Turn on AI agents and Copilot
What to do: With knowledge (Step 3) and a clean ticket structure (Steps 4–5) in place, you can switch on Zendesk's AI from Admin Center > AI. AI agents (the chatbot formerly known as Answer Bot) handle conversations and deflect repetitive questions using your Help Center; Copilot assists human agents inside the ticket — suggesting replies, summarizing threads, drafting from your knowledge. Availability depends on your plan and the Advanced AI add-on.
Why it matters: AI is the highest-leverage step and the one most dependent on the previous seven. It's only as good as the knowledge and rules you feed it — which is exactly why it comes after the Help Center and business rules, not before. Start narrow: point it at a couple of well-documented topics, watch the results, then expand.
Go deeper: Zendesk AI explained
A note on going further with AI. Zendesk's native AI is a solid start. If you later hit its limits — narrow control over how the bot behaves, per-resolution pricing, or you want one AI layer across more than just Zendesk — there's a category worth knowing about: an AI agent layer like Macha that runs on top of your existing Zendesk. It's not a help desk and not a Zendesk replacement; it connects to your tickets and knowledge to auto-triage, draft replies, and resolve routine tickets, while anything it can't handle stays a normal ticket for a human. Worth a look once your manual setup is solid and the repetitive volume is the bottleneck — you can try it free.
Step 9 — Enable CSAT
What to do: Turn on CSAT (customer satisfaction) surveys so a short rating request goes out after tickets are solved. Enable it under Admin Center > Objects and rules > Business rules > Customer satisfaction, then add (or activate) the trigger that sends the survey after a ticket is solved.
Why it matters: CSAT is your earliest, cheapest signal of whether support is actually landing — long before churn or escalations tell you. Switch it on at launch even if volume is low; you want the baseline from day one, not three months in.
Go deeper: Zendesk CSAT explained · for the metrics that pair with it, Zendesk metrics to track
Step 10 — Test, then go live
What to do: Before you point real customers at it, send yourself a few test tickets from each channel. Confirm: the ticket lands in the right group, your acknowledgment trigger fires, the SLA clock starts, a macro inserts cleanly, AI suggests something sensible, and the CSAT survey arrives after you solve. Walk one agent through the Agent Workspace — the screen they'll live in — so the first real ticket isn't their first time seeing it. Then flip the channels live.
Why it matters: Most launch-day embarrassments (replies from the wrong address, internal notes sent to customers, SLAs that never started) are caught by ten minutes of testing. Going live is a decision, not an accident — make it deliberately.
Go deeper: the Zendesk Agent Workspace explained
Frequently asked questions
How long does it take to set up Zendesk? A basic, usable setup — team, email channel, a few triggers, views, and macros — is genuinely an afternoon's work. A polished launch with a Help Center, custom forms, SLAs, AI, and CSAT typically spans one to two weeks, mostly spent writing knowledge-base content and tuning business rules rather than clicking through configuration.
What should I set up first in Zendesk? Your team and groups, then your email channel. You can't route work without somewhere to route it to, and email is where most volume arrives. Everything else — Help Center, fields, automation, AI — layers on top of that foundation.
Do I need to set up everything before going live? No. Launch with team, channels, a couple of triggers, views, and macros, then add the Help Center, SLAs, AI, and CSAT iteratively. Trying to perfect every setting before day one is the most common way setups stall for months.
What's the difference between an agent and an admin in Zendesk? Agents solve tickets; admins solve tickets and configure the account (channels, business rules, fields, roles). Zendesk recommends keeping admins to a small group — roughly one to five — so configuration stays consistent.
Can I automate Zendesk after I've set it up? Yes, and that's the natural progression. Triggers, automations, and SLAs handle rule-based work; Zendesk's native AI handles repetitive conversations; and an AI agent layer such as Macha can sit on top to triage, draft, and resolve routine tickets while humans handle the rest. Macha bills per AI action (any automated step — summarize, tag, route, draft, or resolve — costing 0.5–9 credits depending on the model you choose), not per closed ticket, because most automation is work done along the way, not a single "resolution."
Where do I add channels and business rules in Zendesk? Both live in Admin Center. Channels are under Channels — email and voice under Talk and email (Email, Talk), live chat under Messaging and social (Messaging). Business rules are all under Objects and rules > Business rules — Triggers, Automations, Service level agreements, and Schedules (business hours). Views and macros sit under Workspaces > Agent tools, and people and groups under People > Team.
The bottom line
Setting up Zendesk isn't hard — it's sequential. Get your team and groups in place, connect email plus one real-time channel, stand up a thin Help Center, capture the right fields, add a handful of business rules, organize the queue with views, save your common replies as macros, switch on AI, enable CSAT, and test before you go live. Do it in that order and each step builds on the last, instead of fighting it. Then, once the manual machine is running and the repetitive volume is obvious, that's the moment to consider automating the routine work with an AI layer — you can start a free trial when you're ready.
Setup flow verified against Zendesk's official Launch Guide and getting-started documentation, June 2026. Zendesk updates its product and admin paths periodically — confirm specifics in your own account before relying on them.


